
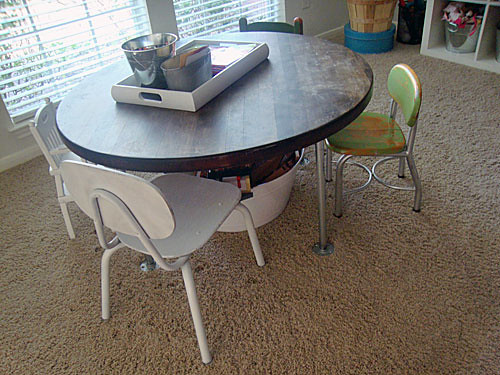
Yesterday, I showed the new legs added to the kid's activity table in the playroom... our table was originally too high and needed to be adjusted to make it more kid-friendly. A few plumbing supplies (yes, plumbing supplies) did the trick and today I'm going to show you how I created this "new" table...

Here's what I started with.... a standard wooden table, the base was attached in the middle with screws...

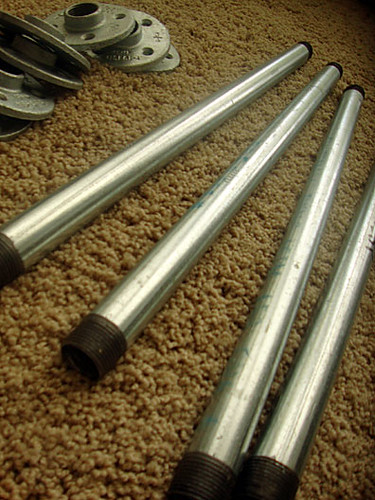
I purchased a ten foot galvanized plumbing pipe and had it cut into four pieces -- 20 inches each -- with some leftover and threaded on each end. Most home improvement stores will cut the pipes for you and charge just a few cents for each cut and thread. Most home improvement stores will also carry pre-cut threaded pipes, but I was set on 22 inches as my table height and needed a custom cut. I also purchased eight galvanized flanges.
So, for this project I laid out the following materials:
- 1 table top
- 4 metal plumbing pipes cut to specification and threaded on each end
- 8 metal flanges
- 16 screws (type of screw depending on the material of the table top)
- drill
- pencil
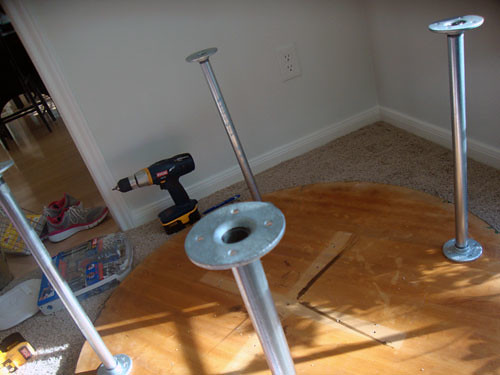
Remove the table top from the base and lay the table top on a flat surface with the underside up, as shown...

Place the four flanges on the table where the legs will be....

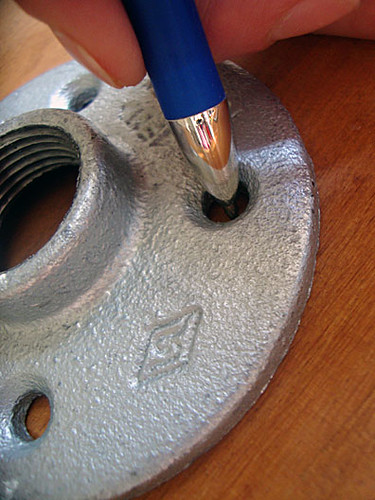
Mark the four screw holes on each flange with a pencil (I only had a pen at the moment)...
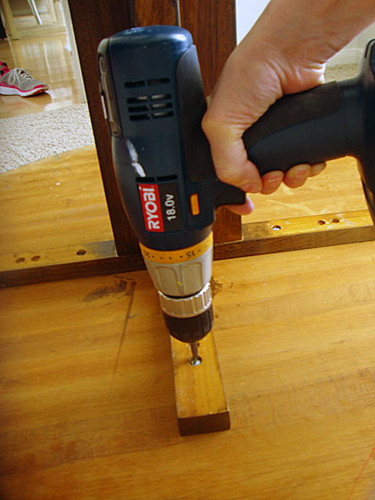
Remove the flanges, then drill the four holes for each flange (16 holes, total) using a drill bit a little smaller than the size of your screws....

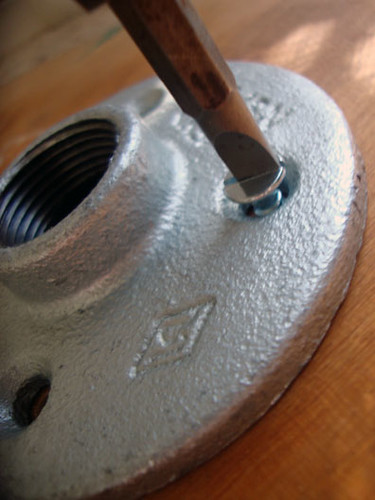
Once the holes are drilled, place a flange over each set of drill marks and begin to fasten the screws...

Then screw in one pipe to each flange....
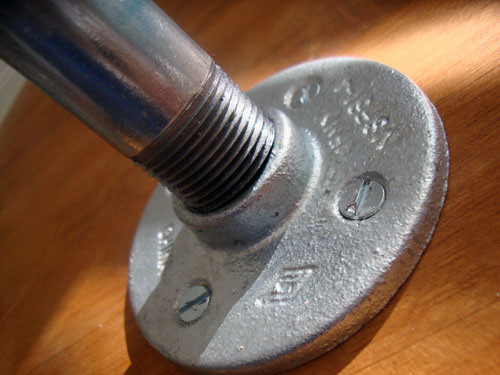
Then attach another flange to what will be the bottom of each pipe....

Turn your table over and it's a whole new look...
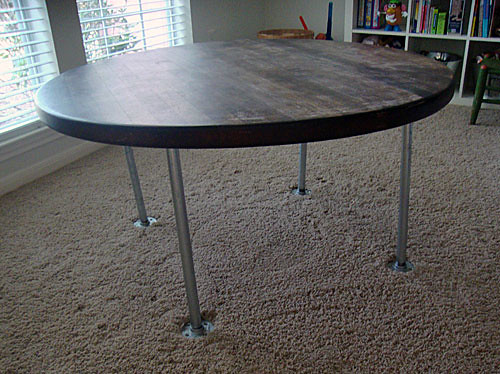
* Before you run out and purchase custom cut plumbing pipes, please take note: The "legs" on my table are not perfectly straight.... this has to do with the way the pipes are threaded. I was told at the home improvement store that they couldn't guarantee a straight cut, nor a straight thread. I wanted to see how it would turn out anyway and since my table sits on a thick rug, I wasn't too concerned. I think it looks fine (unless I get on my knees and analyze it for like ten minutes). It's for the kids and they like it... so I like it. As I said before, home improvement stores do have pre-cut pipes which may be threaded a little more towards perfect.
If you decide to take on this project, let me know. I'd love to hear how it turns out!!!
The next time I read a blog, I hope that it doesnt disappoint me as much as this one. I mean, I know it was my choice to read, but I actually thought you have something interesting to say. All I hear is a bunch of whining about something that you could fix if you werent too busy looking for attention.
ReplyDeleteWebsite
Information