Showing posts with label Kitchens. Show all posts

Mar 16, 2012

Kitchen and Mini Mudroom Update

Over the past several months, I've slowly tweaked our kitchen table area and small mudroom.  Actually, what I call a mudroom is so, so tiny that I don't even know if I can really call it a mudroom, but we store a few on-the-go-items here, so it's our mini mudroom.

Kitchen Table

It was about a year ago that I last talked about the kitchen table and mini mudroom (ha- where has the time gone).... this is what it looked like last year....
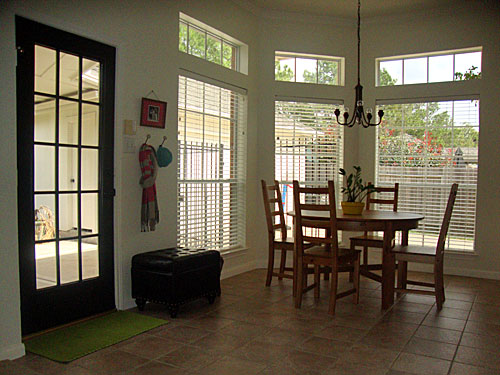
Entry

And now.... progress (after a year!)....

Entry Way

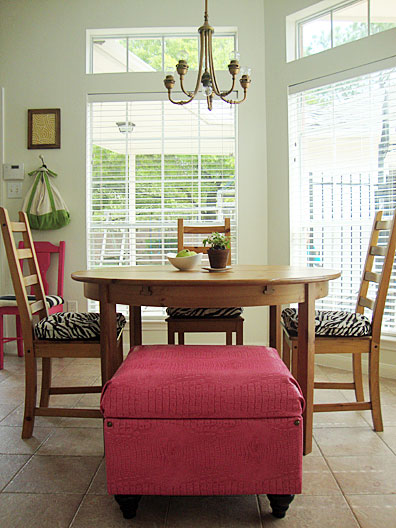
I added zebra print seat cushions to the wooden chairs and recovered the black ottoman with pink alligator faux fabric.  The ottoman has been moved from the wall to the table for use as another seat and storage.... the kids and I keep our everyday shoes inside (the husbands are kept in the black closet).  I only wish the inside of our ottoman looked this neat everyday!

Shoes

On the small wall next to the back door, I added a painted pink chair (Royal Fuchsia by Benjamin Moore) and covered the seat with a wide black and cream striped outdoor fabric from Tonic Living (the fabric in the frame is also from Tonic Living, Theo).
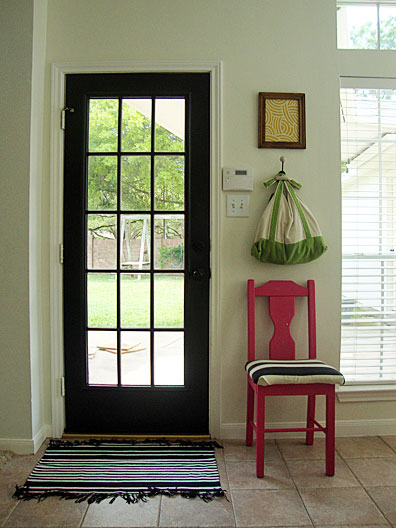
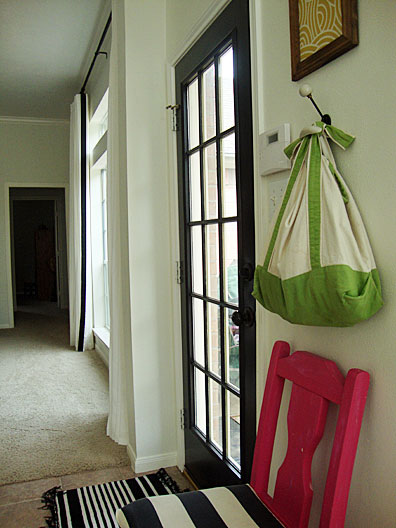
Entry Way

Entry Way

The setup has been working well so far!  I'll leave you with a picture of the freshness sitting on my kitchen table.

Table

Enjoy your weekend (I'll be watching the NCAA tournament and hoping my brackets finish strong!).

Mar 6, 2012

Kitchen Shelving

Open shelves in a kitchen are one of the perfect places to display beautiful bowls, saucers, cups, pitchers, dishes, canisters, vases, frames.... almost anything!  The arrangement can be a mix of pieces that are used everyday, only for special occasions and even objects that are on the shelf purely for color or interest.  I recently rearranged items on the open shelves in my kitchen using our everyday dishes and more....

Kitchen Shelving

When we moved in the house, I removed the cabinet doors, painted the inside shelves Wythe Blue by Benjamin Moore (it's more of a green than blue), and arranged the shelves with a few items from around the house.  Now after living in the house for a year (time flies!), I tweaked the arrangement by adding dishes, bowls and a few odds and ends that had been hiding behind closed cabinets.

Kitchen Shelving

I love it best when old pieces (hand-me-downs, garage sale finds, collected antiques, etc) are combined with the new.... there's warmth and comfort with the old.  This used to be my grandma's soup warmer (there's an electrical cord in the back).... I love it!

Kitchen Shelving

And here's a few more photos of the open shelves.....

Kitchen Shelving

Kitchen Shelving

Shelving

If you're looking for styling tips to decorate your shelves, I listed a few here.... the tips could be applied whether it's shelving in the living room, kitchen, a kid's room, etc.

So, what's your favorite way to display items in the kitchen?

Jun 9, 2011

Goodies Near the Stove

It's no secret that I love food and I love being in the kitchen cooking (most of the time, a girl needs a break once in a while).   A lot of cooking involves standing behind a stove, so when we moved in the house, I tried to organize my cooking must-haves close-by.

Stove

Before I continue, I have to mention that if I ever have the opportunity to design my own kitchen, the stove will NOT be placed on an island, with no barrier -- this seems like a safety hazard.  I do have counter space on the left and right side of the stove, but I'm still not completely comfortable with the stove in the middle of the kitchen (I'm ridiculously cautious about all the little hands around here).

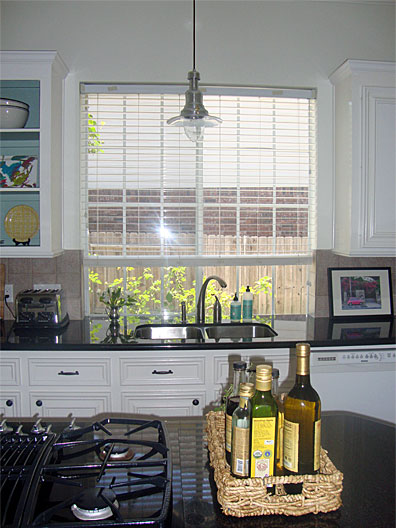
On the left side of the stove, I have a basket filled with little things I use everyday... olive oil, salt, pepper, and my favorite... fresh oregano.

Oils

The little yellow jar is filled with salt... I like the way it looks, hidden away in a fun-looking bowl (I use a spoon to get it out for sprinkling)....

Salt

One thing in the basket that my kitchen wouldn't be complete without.... garlic olive oil.  Amazing.... on just about anything.  If you have yet to try a flavored olive oil (especially garlic), I HIGHLY encourage you to put a bottle in your shopping basket.... you won't be disappointed!

Olive Oil

On the right side of the stove, I have a ceramic pitcher filled with cooking utensils... wooden spoons, whisk, spatula, ladle, etc.

Utensils

Then in the two drawers beneath the stove, one is filled with spices and the other with pot holders (would love to eventually replace the pot holders with something like this)...

Spices

Pot Holders

And of course on the top of the stove is my kettle.... I love it for every reason from making hot tea to the way the greenish color brings color in the kitchen.

Stove

Wow!  I feel a little naked now that I've showed the world the insides of my drawers (well, at least they're the neat ones).  How do you store your cooking goodies?

Jun 8, 2011

Chalkboard in the Kitchen

I love chalkboard paint... whether it's on a whole wall (seen here), painted on a headboard (seen here), on a cabinet (seen here) or even framed and mounted.... I love it!  I think the kitchen or mudroom is one of the best spots for a chalkboard, at least for me.... that's where I spend most of my time.  I can write reminders to myself, 'to do' lists, menus, notes to family members, the kids schedule, etc.

Well, I didn't need much convincing to add another chalkboard area in my house..... I just needed to find the space.  The cabinet wall on the side of the refrigerator was blank and looked like it could use some color (or a place to chalk).  Then I remembered I had just the right sized board (cut from plywood) and it was already painted with chalkboard paint.... the chalkboard headboard from guest room in VA.

chalkboard2

Chalkboard

The main purpose of this chalkboard is for me to write our weekly menu, just like here.  And the kids usually draw on the bottom portion.

Chalkboard

When I walk in the house from the back door/mudroom area, the is my view of the chalkboard....

chalkboard2

And when I walk in the front door and look to the right, there is my new chalkboard...

Chalkboard

Whoa, y'all just got a sneak peak of my totally unfinished dining room.... that's on the list.... just waaaaay down at the bottom.

Linking up to The Trendy Treehouse, Savvy Southern Style, House of Hepworths, Remodelaholic, Fingerprints on the Fridge, Finding Fabulous, Creation Corner, Tatertots and Jello, Craft-O-Maniac, Ginger Snap Crafts, The Thrifty Home, Goodbye City, Hello Suburbs, Chic on a Shoestring Decorating, Not Just A Housewife, Somewhat Simple, I Heart Naptime and Lolly Jane Boutique.

Jun 7, 2011

Ottava Over the Kitchen Sink

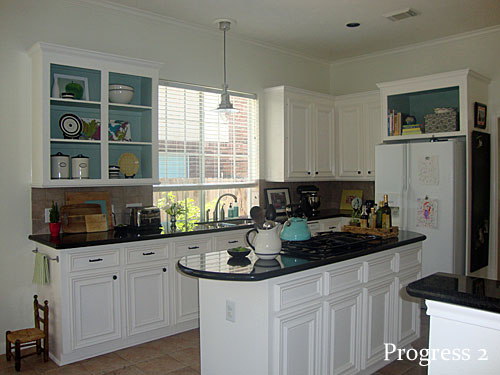
This post is loooooong overdue...... remember the list of projects I was hoping to work on when my parents were visiting?  Yeah, two months ago?  Well, my dad did help me hang the light fixture above the kitchen sink, just like he helped me replace the ceiling light in my son's bedroom.  And now I can see my kitchen sink with clarity.... and all those dirty dishes.  Nice!!

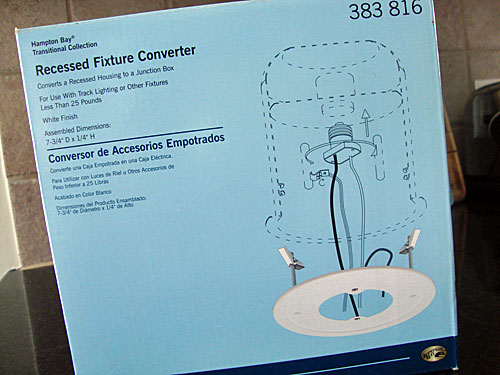
Our kitchen has a ton of recessed lights and I wanted to replace the one over the sink with a pendant light, specifically the Ottava light from Ikea.  I bought a recessed fixture converter (made by Hampton Bay available at Home Depot) and it made the process really, really simple.

Lighting

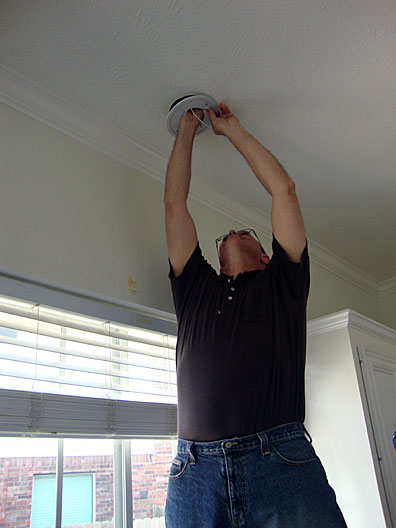
Well, simple according to my dad.  I was more like the proud assistant.... he said screwdriver, I handed him a screwdriver.  He said light, I handed him the fixture.  And so on.  Here he is installing the converter.... I think while he was standing up on the counter, he said something about not posting his picture to the blog.  Hmmm, request denied.  Sorry dad, your handiwork is too good not to be published :).

Lighting

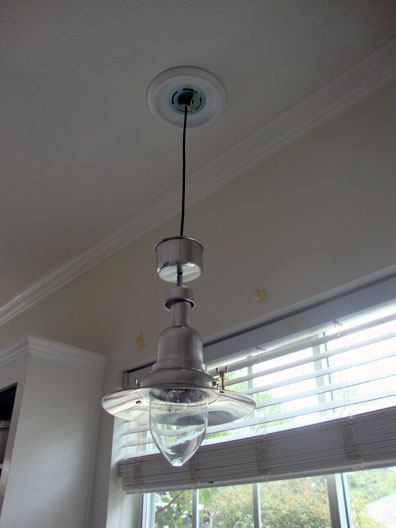
I also bought a medallion to cover the larger-sized whole in the ceiling, then I painted it the color of the ceiling to blend it in a little better.  Almost done....

Lighting

Done...

Lighting

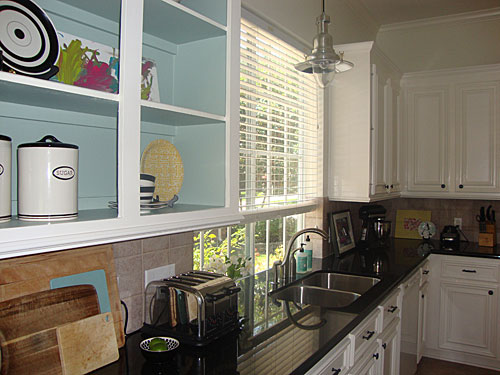
And here's a few more angles of the light in the kitchen...

Lighting

Lighting

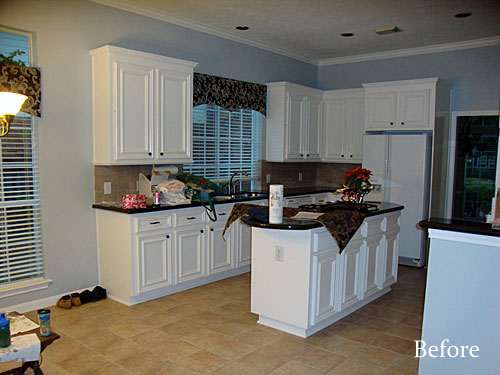
And since I love before and after pictures so much, I'll take you back to where we started.... here's what the kitchen looked liked shortly after we purchased the house...

Kitchen Before

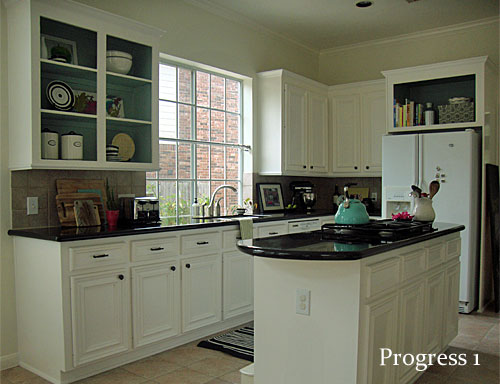
Then after a little paint and decorating....

Kitchen Progress

And now with the new pendant light....

Lighting

Next project for this room..... window treatments!!!

PS - Thanks dad!

Linking up to Remodelaholic and Chic on a Shoestring Decorating.

May 2, 2011

Raspberry Pink

I think my heart skipped a beat when I pulled out my Williams-Sonoma catalog from the mailbox this weekend.  Have you seen the picture on the back?  All the pink... the raspberry pink?

KitchenAid

Yes, I'm lusting over that mixer.... the raspberry color, the clear bowl, the fact that it's a KitchenAid... I love it all.  The husband says I'm drooling.  Am I a little ridiculous?  Maybe.  Ok, yes.  But look...

KitchenAid

So fun, right?  Makes me want to bake (while wearing my new favorite color nail polish from Essie- Super Bossa Nova).  A perfect match.

I already have a black KitchenAid mixer that works perfectly fine, so I will not be running out to purchase the new raspberry color (especially since it retails for well over $300)... although, wouldn't a pink mixer look great in this little spot?

Mixer

Here's a better view.... a shot of pink would look great in the far corner, don't you think?

Kitchen Progress

Is it safe to paint my existing mixer pink?  Just kidding (or... maybe not).

Apr 13, 2011

A Few Projects on the List

The guest room is ready (for now)... my parents are the firsts guests and we couldn't be more excited for their visit.  It'll be like a mini-vacation for all of us, and maybe while the grandparents are here and entertaining the kids for a bit, I can sneak away and work on a few projects.... like:

Hang the Ikea Ottava light fixture above the kitchen sink.


Find the perfect place and hang this precious light fixture, like it was here in our Virginia entry way.


Update the look of the ottoman in the mini-mudroom.... at first I thought I'd recover it with a black and white ticking stripe fabric, but then I pulled out a few other fabrics from my stash (from left to right - Ticking Back, Traditions Black & White, Solid Bristol, Tile Print  and the light green on top was purchased at Printer's Alley -- wish I could remember the name).  Decisions, decisions...


And, finally maybe get a head start on painting the chairs around the kitchen table, similar to my inspiration here...


Hmmm....

I think that's a good list of work while they're visiting... in between visiting alligators at Brazos Bend State Park (this is first on the kids list, NOT mine), eating Berri-Pop frozen yogurt (that stuff is gooo-oood), fishing in the nearby lakes (hopefully I will not see an alligator), going to the Houston Zoo, touring Blue Bell's ice cream factory, making homemade pizza, a little yee-hawin' at a rodeo and of course relaxing in the evenings and catching up with my parents after we've ran around with three preschoolers all day.

Hope you enjoy the rest of your week and maybe sneak in a few decorating projects!!!

Apr 12, 2011

Breakfast Nook Color Inspiration

I've been staring at my breakfast nook with the newly purchased table and chair set from Craigslist and the half-finished mini-mudroom.... they both need work.  Before I jump in and recover the ottoman or slap some paint on the chairs (or table), I want to make sure I choose the right fabric and the right paint color so I get the look I want.

To start, I flipped through my style files stored in my trusty binder and on my laptop.  I stopped at this photo... I've loved the look of this breakfast nook since I first saw it.  I love how so many styles are mixed together with all those perfectly placed pops of color.  It has a way of presenting a lively and fun space.... I want to eat breakfast in this room, every morning.... what a way to start the day!

Apologies, Source Unknown

Since I'm crazy about this room, I'm thinking of painting my chairs yellow (maybe) and then giving them a well-worn-distressed-look.  To bring in more color, I'm searching for a colorful printed fabric for the windows that will tie the colors white, cream, pink, yellow, greenish/blue, and black from the surrounding rooms (kitchen, living room, mudroom).

The table and chair set, and other pieces shared between my breakfast nook and mudroom, look nothing like the items in this picture, but when my breakfast nook is complete, I'm hoping to accomplish a similar feel... cozy, lively, and fun.

Mar 21, 2011

A Kitchen & A Few Gallons of Paint

Toward the end of last week I posted before and after photos of a few, little adjustments I made in our kitchen to freshen the look.   Today, I thought I show pictures of our previous kitchen back in VA, since I used a few ideas from that kitchen to update our new kitchen.

You might remember the post on my "Mom Space" a while ago... that was actually part of the kitchen too.  Now, here's the other side of the kitchen where I actually cooked, baked and did all the fun stuff!

Here's the before...


 And, the after...


Here's the before of the other side...


And the after...


Sooo different, eh?  Paint is amazing.  The ceiling was painted Gentle Tide by Glidden and color matched into a Benjamin Moore paint, the walls and cabinets were painted White Dove, the trim was painted Simply White, and the door was painted Black Beauty, all by Benjamin Moore.

On the back and side of the peninsula, I used a black chalkboard paint to give the kids space to be creative (the chalk usually kept them occupied while I was getting dinner ready).  I also added a desk painted in black chalkboard (sorry for the horrible picture) and a chair painted green that fit under the desk.  The desk held the kid's calendar, jars with crayons, markers and glue, and a bin for scrap paper... they really loved having their own space in the kitchen (so did I).

We didn't have a huge budget to overhaul the kitchen, but with a few coats of paint we were happy with the results... I love paint, it can bring a whole new look to the same room (without spending a fortune)!

Linking up to 'Paint: It's Not Just For Walls' at The Inspired Room.

Mar 17, 2011

Open Shelving = Space for Pretty Things

A few weeks ago I removed french doors that were taking up space in the entry way of our almost-finished playroom.  After the doors were off I walked around the house, with drill in hand, to see if any other doors (or cabinets) should be removed.  I stopped in the kitchen.... and... removed a few cabinet doors...


Before I show you details of what the drill made me do, here's a photo of the kitchen right after we purchased the house (the kitchen was in great condition and one of the reasons we bought the house, just ignore our junk that's spread everywhere)....


I removed the cabinet doors to the left of the sink and above the refrigerator, then painted the insides a green-ish/blue color -- Wythe Blue by Benjamin Moore.


After the interior was painted above the refrigerator, I stepped back to take a look.  I thought it needed a little adjustment.... so, enter the hacksaw!  I cut out the middle wooden divider...


Then I patched, sanded and painted the edges, then added some prettiness on the shelves.... now this is a little more my style!


And, here's a view of the before and after pictures together (after picture is still a work in progress)... 


If you're curious about other changes that were made in this kitchen, the walls were painted Floral White by Benjamin Moore and the valances above the windows were removed.

Next on the list... window treatments and a light fixture...
Related Posts Plugin for WordPress, Blogger...