Feb 28, 2011

Chairs... and Vinyl? Or Maybe Slipcovers?

This was the dining room in our house in Virginia.... I loved having pink in the room (I always love having pink in a room... like here and a hint here).  Some of the chairs around this table have a floral fabric for the top and a striped fabric for the seat, both made of a cotton and linen blend. 


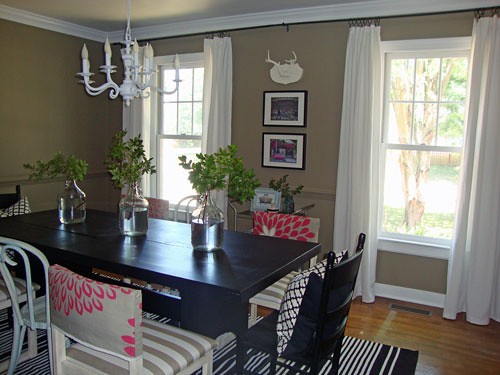
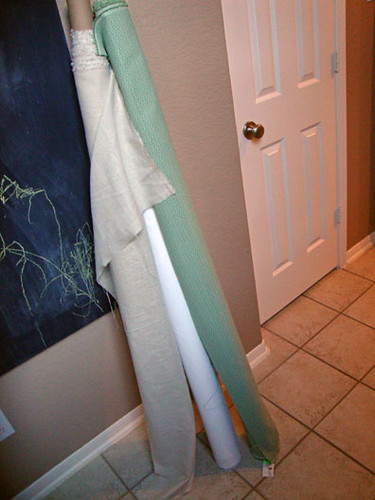
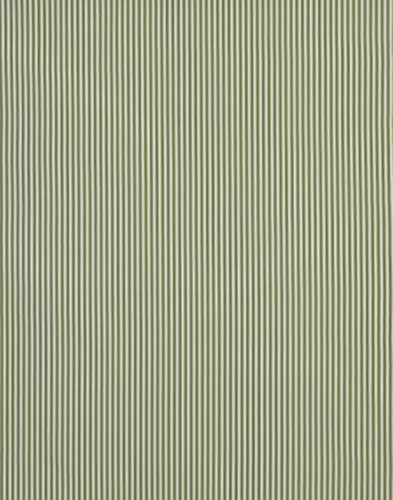
The top/back floral fabric slips over the chairs and comes off for easy cleaning.  See those pretty taupe and white stripes on the seat?  Yeah, well I stapled that fabric to the chairs... mistake #1.


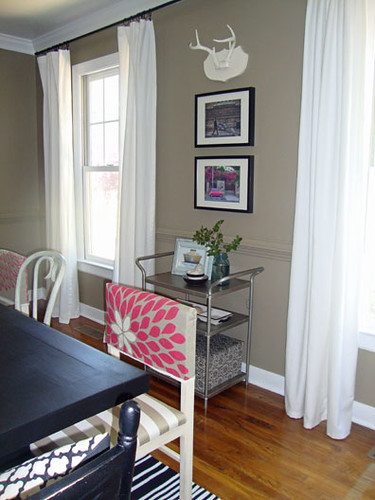
And... they're not so pretty anymore... you see, I picked the beautiful striped fabric because it was going in the dining room and my kids rarely eat in the dining room, especially on these chairs.  I thought I was safe.  Then we moved to TX and I thought I would be smart by moving the dining set, instead of our small kitchen set, into the rental to give us more space at the table.  Mistake #2.

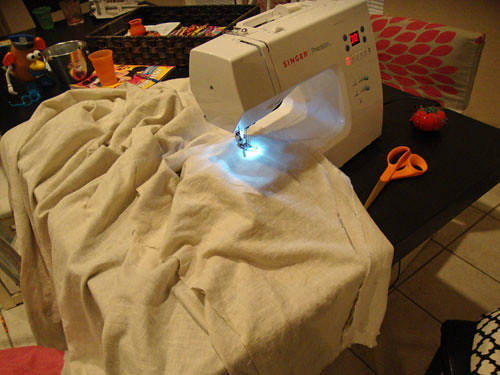
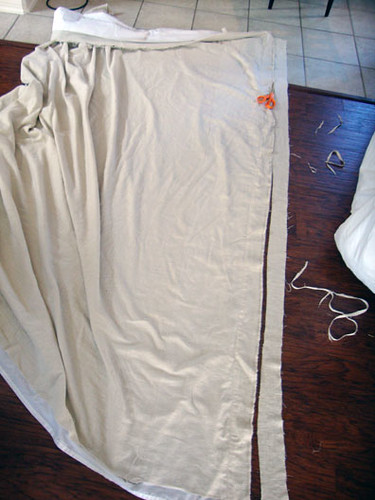
My three preschoolers have eaten on these chairs three times a day for the past three months.  I'll spare you and keep the messy chair pictures for myself, but this time around I'll be recovering the seats in a child-proof fabric, like vinyl, or making a slipcover (like the top) so I can wash them after meals.  Makes for an easy clean!  And, there's nothing more that I love than an easy clean!

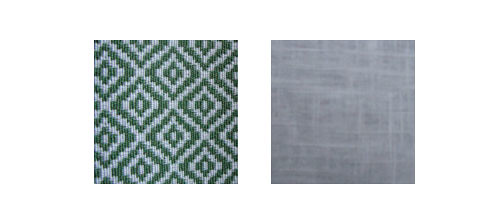
With my love of pink, I'm looking at a vinyl for the seats like this from J& O Fabrics to go with the top/back floral fabric...


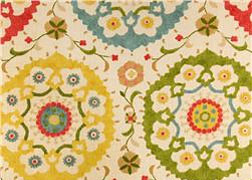
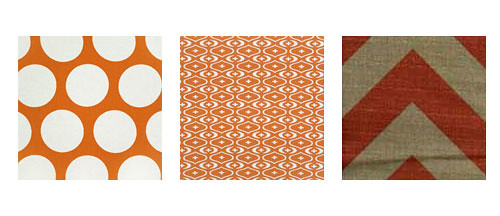
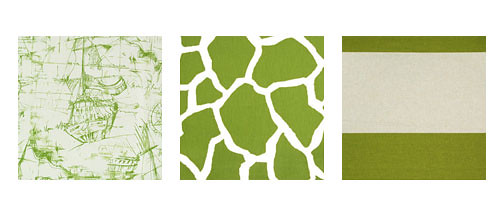
Or give a completely new look using fabric with bursting colors to make into slipcovers (for the back and seat of the chair), something like this from Fabric.com ....


A big burst of fun in the dining room!!!  I'll keep you posted on what I decide to do with the chairs to make them more kid-friendly!

Feb 25, 2011

Celebrate with a Raspberry Cappuccino Smoothie

I've unpacked the blender, it's time to celebrate!!!


We are smoothie lovers over here, and Mary and Sara Corpening's book, Super-Charged Smoothies, is completely amazing -- times ten!  To celebrate our move and more memories to be made in a new house, we whipped up the Raspberry Cappuccino Smoothie...who could pass up this picture from their book (not me!)?


Mmmm, my mouth is watering again just talking about it.  If you'd like to get your chocolate fix and make the Raspberry Cappuccino Smoothie, the recipe is available on Babble.


I omitted the measurement for coffee/espresso.... even just a tiny bit of caffeine makes my head spin, I get sooo dizzy I have to lay down.  I know... weird, huh?  I guess what we drank was really something like a raspberry chocolate smoothie, but it was YUMMM-EEEE!  So, whether you decide to blend in the caffeine or play it safe (like me), enjoy all that deliciousness!!!


Oh, and while I'm talking about the Corpening sisters, their "First and Forever Bride and Groom" cookbook is THE BEST, ever!!!  I've been using it at least five nights a week for the past seven years, so much so that it's duct-taped together in several places.  Following their recipes makes creating great dishes easy and has given me the confidence of an experienced, gourmet chef (ok, well maybe not gourmet!).

Enjoy your weekend (and a raspberry cappuccino smoothie... or two)!

Feb 24, 2011

Home Sweet Home

We made it... we moved a mile up the road, and amongst the boxes, packing paper, and three preschoolers, we're slowly getting settled.  I love the fact that Houston has 70 degree days in February so the kids can entertain themselves doing things like this...


and this (especially when using moving supplies as toys, a.k.a packing tape)...


 or just simply sitting in awe of a giant moving truck.


The kids love discovering these new adventures all while I'm sorting through this...


 and this...


and covered in this...


Then when we're all worn out and need a break, we sit down with one of these (orange cranberry muffins from Panera Bread)...


yum!!!  See you in a few days!!!

Feb 22, 2011

Boxes Piled High

We're packed and ready to move...


See you in the new house!

Feb 21, 2011

A Surprise in the Closet

The plan for my 3-year old son's room is coming together, slowly!  But, I'm ok with slow... I get to hear "WOW" from him almost daily, every time we complete even the smallest project.  Last week I added some paint to his closet... we now have a green closet.

I love the surprise when his closet door is opened.  He says "WOW", then calls it his army tent!


 We used the color Leapfrog from Sherwin Williams, the perfect pop of green....


And, since he slept in his new room for a nap one day (while I was doing other things around the house before we move in), I thought I'd give you a small glimpse of the bedding.  Remember these fabrics and the plan -- DINO-mite?  Here they are....


Now, this bedding was all put together on an air mattress, but it was exciting to see the colors and textures layered together.  Those dino sheets are so great, my 3-year old pretends he's sleeping in the desert with the dinosaurs... I love it (and I absolutely love the pop of green coming from the closet)!

Feb 18, 2011

Kitchen Space Turned "Mom Space"

Last week I posted pictures of our new playroom with the french doors removed -- yea for more space!  Well, after the doors were down and my happy dance complete, it didn't take long before I started thinking about what other doors (or cabinets) could be removed to give the house a more open feel.

While I was walking around the house looking at doors and cabinets to "fix", I thought about the kitchen/desk area back in our Virginia house that I turned into my very own "Mom Space".  This was the desk area in the kitchen on the day we purchased the house....

Before...


And after a few "fixes"...


And, since I absolutely love before & after photos, I thought I'd give them to you again -- side-by-side for the full effect....


The cabinet hardware, doors and drawers were removed, then the cabinets and drawers were  cleaned, patched, sanded (just a little), primed and painted.  The cabinets were painted the same color as the wall, White Dove by Benjamin Moore, except for the upper inside... that was painted a greenish/blue color (Gentle Tide by Glidden), just like the kitchen ceiling.

The side of the bottom cabinet was painted with black chalkboard paint.  I loved to write our weekly menu on the chalkboard... it seemed to keep everyone happy.  I could easily remember why I bought four cans of crushed tomatoes at the grocery store earlier in the week and the husband always looked forward to dinner certain nights of the week (and probably knew what days to eat a BIG lunch so he wouldn't be hungry for dinner).


I also hung fabric on a tension rod to conceal the computer printer, paper and all those not-so-pretty-to-look-at cords.


This project really just involved a lot of paint... I love how much paint can turn a room around for the better, for not very much $$.  And, now that I'm seeing this cabinet transformation again, I'm looking at my kitchen here in Texas and thinking I might have another "cabinet project" to put on my list.  Doors removed = lots of space for pretty things!

Linking up to The Thrifty Decor Chick320 Sycamore, Remodelaholic, Domestically Speaking and Savvy Southern Style.

Feb 17, 2011

"Moving Sale"

I took a detour on my way to the grocery store earlier this week and.... I ended up at the fabric store!  JoAnn Fabrics had a "Moving Sale/50% Off" sign out front and I couldn't let myself just keep driving.  So, the kids and I parked and hopped out.  I tried to quickly maneuver through the aisles (with the tiny green cart and three kids hanging off the sides) to see if anything caught my eye.

And, and hour later we walked out, then went to the grocery store, and eventually came home with these three amazingly priced rolls of fabric...


They all fit perfectly with the plan for my son's bedroom, and at such a great price!!!  Both the linen and diamond jacquard were priced at around $3/yrd.  Score!!!  The white roll in the back is for lining curtains and was priced a little more.  Here's a close-up of two fabrics:


Later I went to work.... sewing a duvet with the newly purchased linen fabric (I was originally going to sew the duvet out of painter's drop cloth, but when I saw the linen priced at less than $3/yd, I couldn't pass it up).  So, I did a little bit of this (while Mr. Potato head watched)...


and a little bit of this...


all, to get to this...


The plan for his room is slowly coming together!!!

I do have to say... this was my first time sewing a duvet and it was actually really simple, just like sewing a giant pillowcase.  I didn't use a pattern, I kinda just eye-balled it (probably not the best way), but if you're looking for in-depth duvet making instructions, Design*Sponge has an excellent tutorial.  Happy duvet making!!!

Feb 15, 2011

House Keys and Some Love

For Valentine's Day yesterday I gave the husband framed art.... art with seven keys, house keys that is...


You see, seven years ago (on Valentine's Day) the husband proposed (love him) and since then we have moved seven times (still love him).  Now, don't get too excited... we haven't lived all over the world or anything.  Sometimes the next house involved just moving across the street!  None-the-less, these keys represent the different locations and houses we've lived, and all the memories that filled those homes.  We're getting ready to fill our seventh home with plenty of memories and are excited to get started -- soon!

Now, if you're interested in making something like this, it's really easy!  I laid out the actual keys on drawing paper -- paper like this, then traced the keys with a pencil.  After all the keys were traced in pencil, I removed the keys and carefully traced over the pencil lines with a metallic gold fine-tipped marker, like this -- the Prismacolor Art Marker (worked perfect!).  Then I wrote the address and date we lived in each house under the corresponding key.  Once the addresses and dates were written and ink was dry, the drawing part was done.  Time to frame!

I used regular brown kraft paper to function as a mat for my frame.  I cut the kraft paper to fit the frame, then taped my "key art" in the center of the cut kraft paper.  I put the frame back together and voila, great art with a personal touch!

We have seven keys in our frame, but this would look great with any number of keys, even with one key (first house, maybe?).  For one key, I'd make a photocopy of the key, then enlarge it to fit the majority of the paper, then cut-out the photocopied key, trace in pencil on drawing paper, trace again with marker, then put the frame together.  So easy!

The pictures above show the temporary holding spot for our new art.... we'll be moving in a few days (the seventh house) so the frame will soon have a more permanent place to rest.  Bring boxes and packing tape...

Feb 14, 2011

Happy Valentine's Day

Hope you enjoy sweet time today (and a chocolate or two!) with the ones you love!!!

Etsy - Romona Owen Designs

If you're looking for a last minute Valentine's Day card, I put a few designs together here last week.... download and print, all for FREE.

Happy Valentine's Day!!!

Feb 11, 2011

Sticky Hands, Warm Heart

Since Valentine's Day is fast approaching (this Monday!), the kids and I made a few hearts to give our mantel a little love.  We created these funky hearts using string and a gluey mixture, baked them, then strung our new art above the fireplace.


We followed the directions for this craft, "Sticky Hands, Warm Hearts" from the Family Fun magazine by Disney, as seen below:

Materials 
Yarn, Heart-shaped cookie cutter, Parchment paper, Cornstarch glue, Water

Instructions

1.  First, make the glue by combining ¼ cup of cornstarch and ½ cup of water in a saucepan and stirring until smooth.

2.  Heat the mixture over medium heat until it's thick and translucent. Allow it to cool to the touch.

3.  Cut yarn into foot-long pieces.

4.  Place a heart-shaped cookie cutter on the shiny side of a piece of parchment paper. Have your child push a piece of yarn into the glue to coat it. Pick up the piece and run it between a thumb and forefinger to remove the excess glue. Lay the yarn inside the cookie cutter.

5.  Repeat with the other pieces until the yarn fills the heart shape in a thin layer. With clean hands, press the yarn flat. Gently lift off the cookie cutter and allow the yarn to dry hard, at least a day.

6.  You can speed up the drying process by placing the hearts and parchment paper into an oven set to "warm" for an hour or two.

We did the speedy drying procedure using the oven (#6).  We're (okay, maybe it's just me) a little impatient and wanted to hang our hearts asap!  The kids had a blast working on this fun (and messy) craft.... definitely worth the mess.

Feb 9, 2011

French Doors

I absolutely love, love, love french doors.  I love them au natural, painted white, painted black, and especially painted in a fun, bold color.  We had painted white french doors in our house in Virginia and I loved the look.  This was a corner of our living room and the french doors opened to a sun-room -- or playroom as we called it, it was such a perfect layout...


The playroom in our new house also has painted white french doors on the entry way (think office), but today..... they were taken off.  As much as I love french doors they just weren't working for the room.  The doors took up way too much space when they were opened, almost three feet on each side!

Here's the before...


And now....


I want to give the kids as much space as possible to play, so the doors had to come down (curtains too).  Ahhh, I feel like I can breath now.... sooo clean!  It probably helps that some of the walls are now a lighter color (Floral White by Benjamin Moore) and the carpet has been updated (Martha Stewart for Home Depot).

Now, here's a little secret.... I decided not to patch the trim where the hinges were since the doors may eventually go back on (ya never know) and I'd hate to have to ask my super, sweet husband to carve away trim for door hinges.  So, I just painted the holes the same color as the trim and hopefully it'll blend so it's not such an eye-soar.  If you're ever in my house, just don't look to close :)  Shhh....


Oh, and did you catch a glimpse of the black chalkboard wall?  I love it (more on that later!).

Feb 8, 2011

Free Printables: Valentine's Day Cards

We're making our Valentine's Day cards over here this week... some are handmade (kids love anything involving glue) and some are digitally made.  I love graphic design, so Valentine's Day gives me an excuse to get creative and put together some layouts.  And, these ones are for you... feel free to download the pdf file at the bottom of the post and use them for your loved ones... enjoy!!!


Valentine's Day Card - I Love You:  Download
Valentine's Day Card - Bee Mine:  Download
Valentine's Day Card - Cruisin' By:  Download

Each file has four of the same designs on a page.  Click "Download" next to the card(s) you want.  Google Docs will open, click "File" under Google Docs, click "Download Original" to download or click "Print (PDF)" to print.  Print on 8.5/11 paper (preferably white/cream colored card-stock), then cut down the middle both horizontally and vertically.  Four Valentine's Day cards are now ready to be addressed!

Linking up to Sassy Sites.

Feb 7, 2011

Dino-mite Boys Bedroom

Last week I posted photos of amazingly designed boy's bedrooms, then my detailed (maybe too detailed) thought process on how I eventually came up with a plan for my 3-year old's new room.  Here's the plan... it's DINO-mite!!!

1  Paint: Benjamin Moore Grant Beige on all four walls.

2  Window Treatment: the Dandy Cotton chocolate/white large polka dot fabric will be made into either a roman shade or ceiling-to-floor-length drapes (and possibly a pillow).  Fabric is by Premier Prints Fabrics, available thru Buy Fabrics.

Lamp: Clip Led Lamp for reading during rest time or before bed, available at Target (already have it, cross that off the list!).

4  Duvet Cover: the natural linen duvet shown is from Pottery Barn and is actually trimmed in velvet, but I need to spend as little as possible on the duvet... so I plan to sew a duvet out of dropcloth (soooo cheap!).

Blanket: already have a green blanket!!!  Cross that off the list too...

6  Sheets: my 3-year old is all about dinosaurs, so when I saw Dinosaur Sheeting from Pottery Barn Kids, I was sold (not sold on the price, but if I keep other costs to a minimum I can swing the sheets!!!).  So perfect... I love how all the colors in the room are tied together in the sheet -- white/cream, tan, brown and green.

Euro Pillow: the West Elm studded pillow is so sophisticated, I love it!  Oh, and we already have this too!

8  Throw Pillow: of course we all need at least one throw pillow, so here's a great print.... Grass Green available thru Tonic Living.

9   Map: Jordens Vegetation Map Giclee is on my wish list... it's so great, I love the colors!  It's from Ballard Designs and would go so perfect with this room.  I don't think it's in the budget, but I'll be keeping my eye out for something similar, only a little less $$.

10  Chair: the Jules junior desk chair from Ikea would be a perfect fit for drawing at the desk (eventually studying) and easily slide under the desk when not it use.

11  Furniture: we're using the furniture we already have for his bedroom... a wooden twin captains bed (seen here), two small side-by-side armoires and a desk.  To change it up a bit, I'm going to trim off a few pieces on the desk and paint it green to look similar to the green Parsons desk that West Elm used to sell.

Time to go shopping!!!

Feb 4, 2011

Cozy Day

Houston is suppose to get a rare occurrence of snow and ice today... and since it's freeeezing outside this morning, the kids and I will be cuddled on the couch, wrapped in a blanket, wearing our slippers and drinking hot cocoa...


and reading tons of books.... these are a few of their current favorites...


1.  "Pigs Will Be Pigs: Fun with Math and Money", by Amy Axelrod (Author) and Sharon McGinley-Nally

 2.  "Stand Back," Said the Elephant, "I'm Going to Sneeze!" by Patricia Thomas (Author) and Wallace Tripp (Illustrator)

3.  The Little House Collection Box Set (Full Color) 2004, by Laura Ingalls Wilder (Author) and Garth Williams (Illustrator)

Enjoy your Friday!!!

Feb 3, 2011

Sweet Potato, Avocado or A Little Dino-mite?

Earlier this week, I posted inspiring photos of boy's bedrooms and it got me thinking how I'd like to style my 3-year old's bedroom in the new house.  Here's a glimpse of what his bedroom looked like back in VA... lots of blues and lots of wooden furniture (even more wooden furniture on the opposite wall)...


I want to freshen the look, so after finding some amazingly designed boy's rooms on the web, I then scoured fabric stores for more ideas.  I have a limited budget so I can't replace everything, but I thought if I keep the striped navy and white quilt, add a duvet cover and window treatments with a contrasting color, it'll give the room a burst of fun.

So, how about orange?  Such a positive color, right?  Its been said that orange evokes happiness, creativity, determination, success, encouragement, stimulation, etc.  Perfect color for a 3-year old!!!

The Metro Duvet Cover in orange from Pottery Barn Teen was a good start.  I especially liked the metal grommets and two cargo pockets on the duvet... perfect to hold his small books, little animals and cars, or even some crayons and paper to write mommy an "I love you" note!!!


Then to offset the navy and white stripes in his quilt and pick up the orange color in the duvet, I thought any of these fabrics would work as a window covering and give the room a jolt of color...


Carrie Orange is available through Tonic Living, those extra large polka dots are so lively!  Akita Cotton Drapery Print - Sweet Potato/Natural is available through Buy Fabrics, it's a little on the traditional side, but the color would add some unexpected drama to the room.  And, a chevron print would also be great for the windows, like Zippy Stone Arizona/Denton by Premier Prints available through Buy Fabrics.

I liked the orange, but also wanted to see if any green colored fabrics had some interesting patterns.  Here's what I found...

The Ikea narrow green and white vertical striped Sofia fabric would make a great duvet cover and would look fantastic under his quilt....


To coordinate with the green and white stripes, I thought any of these prints would look great on the window.


The Schooner print almost looks educational... I think he'd love to wake up every morning and see ships hanging from his window.  The Giraffe print is so fun, this is a fabric I'd even make into a pillow for the living room.  I love it!  And the Kaitlin Linen print is great too... very nautical  (I'd hang these horizontal on the window since the stripes on the duvet would be vertical).  These three fabrics are all available thru Buy Fabrics.

As much as I thought any of these options would work, I wasn't sold.  I want to LOVE the whole look and I really want my 3-year old to LOVE it too.  So, I kept these options in my head and continued the search.  THEN, it happened!!!  I came across these sheets and everything changed (well, not everything), but I ended up putting together fabrics in what, I think, will be a dino-mite room!!!


Stay tuned, I'll show you the plan early next week!!!
Related Posts Plugin for WordPress, Blogger...