Showing posts with label Lighting. Show all posts

Oct 11, 2011

One Question: Boy & Girl's Shared Bedroom

'One Question' is a series I started to answer reader's decorating questions with a hope to inspire others who have a similar dilemma.  My cousin recently asked me how I would style a shared bedroom for her little boy and girl.  Her son currently has a little bit of a western style in his room and her daughter has a lot of pink.... now that the kid's bedrooms are going to be combined, she's willing to makeover the new space they'll be sharing for a short time, but without spending a fortune.

My cousin describes her style as classic with a few modern accessories, especially anything with a chevron or ikat print.  She'd love for the kid's room to have a school-type feel and is willing to take on some DIY work to keep within her limited budget.  I think she's very creative and will have fun putting the room together (with some hands-on work).

Mood board for a little boy and girl's shared bedroom:

Shared Bedroom Mood Board

The details:

1.  Paint Colors:  I thought a light and dark teal color combined with orange would be the perfect colors for a boy and girl's shared space.  To make the room more feminine for the girl's area, I also threw in a bit of pink....my favorite color!  To balance these bold colors, I chose Moonlight White for the wall color and Simply White for the trim, both by Benjamin Moore.  The paint colors are both a creamy white and with light colored walls, it'll really open up the space and give a clean feel (I know how fast a kid's room can turn messy!).  It will also help to emphasize the furniture, fabric and pattern colors!  To add a bit softness and dreaminess to the room, I chose a very light teal color for the ceiling, Adanna Aire by Mythic Paints.  (That's all DIY project #1- paint walls, trim, ceiling).

2.  Girls Bedding:  The girl's bedding has a little more pink than the rest of the room.... I'd start with a simple set of white sheets and a comforter or quilt.  Then to dress it up, add a few girly pillows..... I rested a pink and orange smiley face Hold Me Tight Pillow by Land of Nod in front of a larger orange, pink and white chevron pillow made from Anette Tatum Bohemian fabric (that's DIY project #2- make pink chevron pillow).  The green throw draped over the edge of the bed is from West Elm... it adds more color to the room and ties in with the green chevron on the boy's bed.

3.  Toddler Bed:  The girl's (or boy's) white, toddler bed shown above is the Cataline Toddler Bed from Pottery Barn Kids (it also comes in other finishes).

4.  Nightstand:  The carved wooden table from World Market brings texture to the room and is the perfect place to set a drink, book, doll or even crayons.  The round shape is more playful than a traditional straight-edged nightstand and most importantly, it has no low sharp corners.  I topped the table with a pink, orange and green Pumpkin Girl Doll and a Color It In Art Set, both from Land of Nod.

5.  ABC Cards:  These ABC cards are an awesome free printable from Design*Sponge.... the entire alphabet is available for print (4 letters/page)!  It was intended to be used as a birthday card (cute idea), but I'd print, cut and glue each card onto twine and drape it across the room, from wall to wall.... kinda like a banner.  (DIY project #3- make ABC banner).

6.  Curtains:  The white curtains are from Ikea, Ritva Curtains.  They're affordable and can be easily hacked..... since orange is one of the main colors in the room and my cousin is swooning over ikat prints, I chose a small orange ikat fabric for trim on the curtains.  The fabric is made by Michael Miller and available thru Tonic Living.  The fabric would need to be cut and sewed (or glued onto the curtain), but what a difference..... quick update and beautiful outcome.  Janell, from Isabella & Max Rooms has an amazing tutorial on adding trim to curtain panels.  (DIY project #4- add trim to curtains).

7.  Map:  Anthropolgie's vintage map wall calendar is adorable... I'd tear out a page (or maybe more), frame it and hang the map on the wall.  On the board it's hung above the twin bed, but if more maps were framed, I'd group them together.  (DIY project #5- turn calendar maps into framed artwork).

8.  Boy's Headboard & Bedding:  My cousin is grounded in the classic style, so I opted for an upholstered, nailhead trimmed headboard.... the Kate Headboard from Z Gallerie.  The design is simple and would work well as the kids get older (or if it needs to be moved into another room).  An upholstered headboard is actually an easy DIY project and could be done for a much cheaper price than purchasing a finished product.... Centsational Girl has two awesome headboard tutorials here and here, she uses a curved headboard but the tutorials could also be adapted for a straight headboard.  (DIY project #6- make headboard).  To stay with the classic look, I added a Blue Oxford sheet set by Ralph Lauren.  They're so perfect for a boy's bed... the blue and white pin stripes can be coordinated with a variety of prints, classic or modern.  A white comforter or quilt would look great folded over at the bottom of the bed with a white bedskirt and a green throw (same as the toddler bed) laid on top.  To finish the bed, I'd set a few bold pillows at the top using two fabrics: Annette Tatum Bohemian Chevron Teal and Sunny Side Orange Crush.  (DIY project #7- make teal chevron pillow and orange pillow).  Lastly, to make reading in bed more enjoyable a floor lamp is always a great addition.

9.  Print:  To give a personalized touch to the room, the I Am A Child of God print from Persimmon & Pink would look great hung on a wall in the bedroom (maybe above the toddler bed).  The colors in the print help to bring the room together..... teal, yellow, orange, pink.  Perfect!

10.  Painting:  The abstract expressionist painting, from Robert Bangert available tthru Etsy, is absolutely beautiful.  It's a stretch on the budget, so I'd recommend letting the kids create their own artwork together on a large size canvas.  Let them use the same colors shown throughout the room.... and to keep the masterpeice from turning brown after all their paint colors have been mixed and swirled around together, paint one color at a time and let it dry before getting out another color.  This could be a week long art project.... I know it's something my kids would love to do.  (DIY project #8- let kids create large painting masterpiece).

11.  Dresser:  The orange dresser, by Sydney Barton, is amazing!  I love the bold color and I think it's a great piece to add in a shared bedroom.  Of course this another DIY project.... (project #9- paint dresser).  To paint the dresser, Sydney used an orange color called Corlsbud Canyon (076) by Benjamin Moore.  Whether you have a dresser or purchase one at a consignment store, this project could be really fun.... you could also change the look of an outdated dresser by updating the hardware!  On top of the dresser, there's a few things I thought necessary in a kid's bedroom.... books (Clothbound Penguin Classics available at Anthropologie), lighting (Stacked Geo table lamp available at Target) and since I placed a doll next to the toddler bed, the dresser has a turquoise dinosaur.  On the floor is another must-have, Alphabet wagon and blocks available at Anthropologie.

So there you have it.  A shared space for a little boy and girl that's classic, yet modern and full of DIY projects!  I can't wait to see how the bedroom turns out!

Aug 17, 2011

Girl's Bedroom Big Reveal

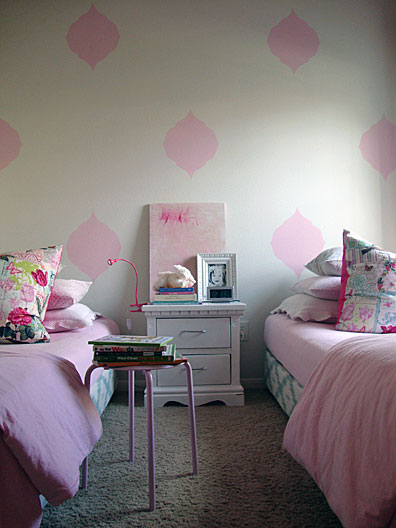
My girly-girl's room is decorated..... all in pink!  I'm a huge fan of pink and I must have passed on my love of this color to my girls because when I asked what color they wanted their room, their response was pink (almost in unison)!  Perfect!!!  So, we call this "Dreaming in Pink".....

Girls Bedroom

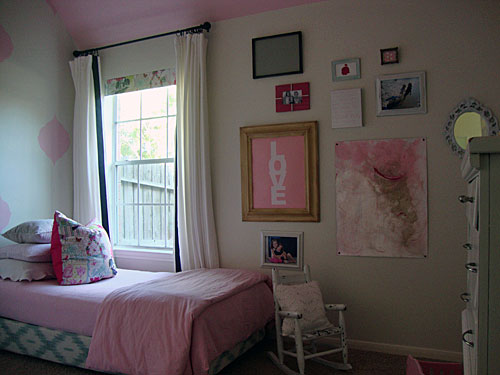
After deciding on the layout of the bedroom (seen here, here, here and here), the girls and I knew we wanted a lot of pink throughout the room.  We always seem to have lots of pink things around the house, so we only needed a few things (and plenty of work) to bring it all together.

Girls Bedroom

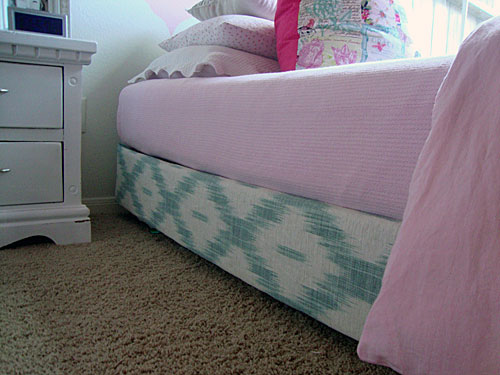
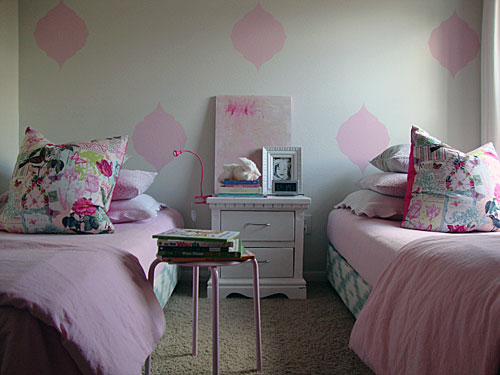
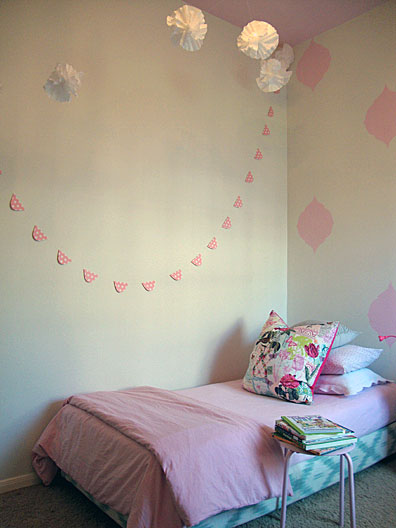
For the bedding, we used a few things we had on hand (Shabby Chic floral sheets, a cotton pink blanket, a white scalloped pillow), then added fabric with additional color.  After looking at fabric, I decided to lift up the box-spring with wooden legs and wrap the box-spring in Laura Ashley's gorgeous teal ikat print.  I glued the fabric to the box-spring using Fabri-Tac.... a super, simple project and well worth the time.  No more adjusting a bed-skirt every time I make the bed!

Girls Bedroom

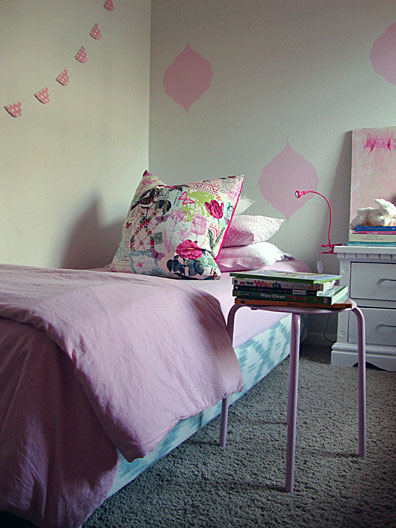
Near the top of the bed, I piled three pillows.... a king-sized (the scalloped white), then a tiny floral print (same as the sheets) in a standard size, then a smaller size pillow covered in a black and ivory ticking stripe fabric.  The large euro size pillow in front was made with Micheal Miller's floral print (Belle Rose in Pink) on the front a solid fuchsia color (Hibiscus in Pink) on the back.

Girls Bedroom

The comforter folded at the bottom of the bed is a simple, inexpensive duvet sold by Ikea, the Dvala.  The duvet came in white, but I used the powder form of Rit Dye in Petal Pink to make it pink.  I stuffed the duvet with the girl's old comforter from their previous room in VA, seen here.  In all honesty, I was nervous about dying the fabric, but the process turned out to be quick and painless.  I used one packet of dye for both duvet covers and followed the washing machine method... both covers came out of the dyer completely solid pink, no streaks!  Great results (it was so easy, I think I might be doing this again for another room!).

Girls Bedroom

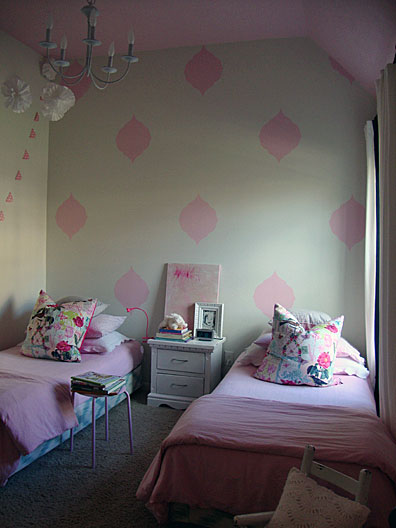
The twin beds do not have a headboard or footboard.... I thought about buying two or making two.  Then I looked at my budget... it wasn't much, so I opted to skip the headboards and use pink paint (Rose Garden by Benjamin Moore) I already had to paint a design on the main wall.  I created a stencil out of heavy cardstock taped together (so it would be bigger than standard 8.5" x 11" paper) , measured where each design should be on the wall, traced the stencil in the marked spots, then finally painted inside the lines.

Girls Bedroom

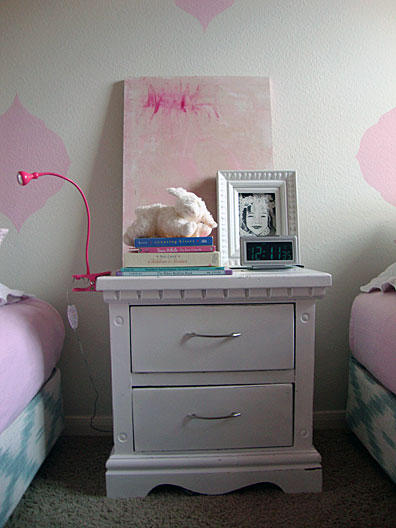
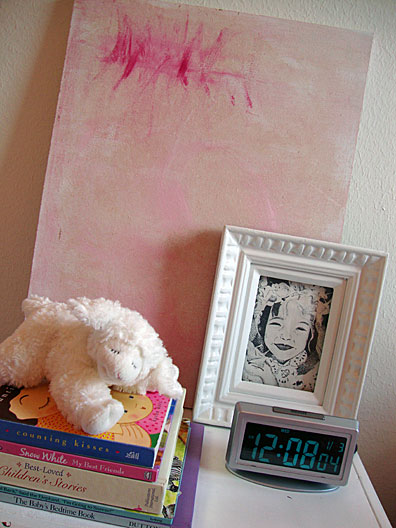
In between the twin beds, I placed a nightstand and topped it with one of my paintings (in pink, of course) and an art piece I had done in pen and ink way back when I was in high school!  It's the image of a young girl wearing a floral hat.... I absolutely love it because I think the girl actually resembles both of my girls... it's a perfect fit!

Girls Bedroom

Girls Bedroom

On one side of the room, there's a window and a partial blank wall.  I added Ikea Lenda curtains (from my dining room in VA- I cut off the tab tops and hung them with clips), then added black grosgrain ribbon on the edges, just like in my living room (tutorial here).  There's a roller shade behind the floral print above the window.... I like to hide the stark white shades, (just like I did in my son's bedroom, tutorial is here).

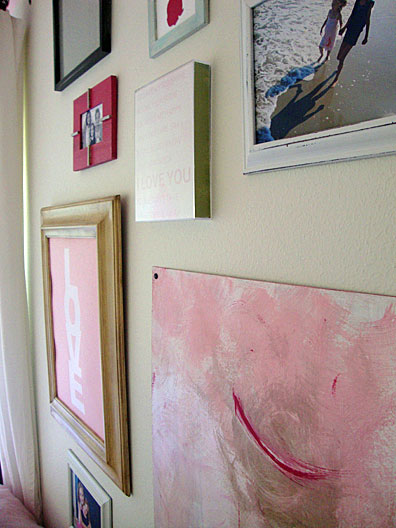
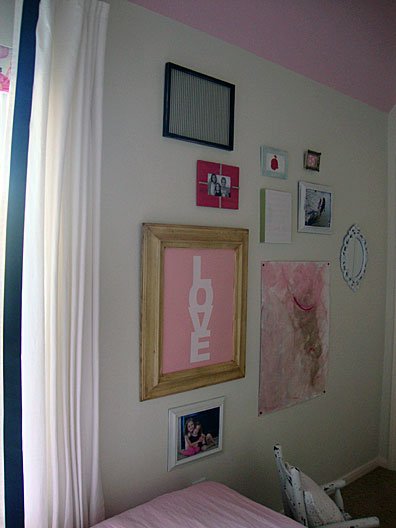
On the blank wall, I added a gallery wall... I love gallery walls, like here and here).  It's a mix of photos, fabric, a silhouette, a mirror, another one of my paintings, and Made By Girl's LOVE print in the bubblegum color.....

Girls Bedroom

Girls Bedroom

On the opposite wall, I added a mixture of two banners that I strung across the wall/room.  For the pink banner, I cut dome shapes out of polka dot wrapping paper and hot glued them to string.  For the white banner, I scrunched about five white coffee filters and hot glued them together.  After I had several "balls", I hot glued them to string and stung them across the room.

Girls Bedroom

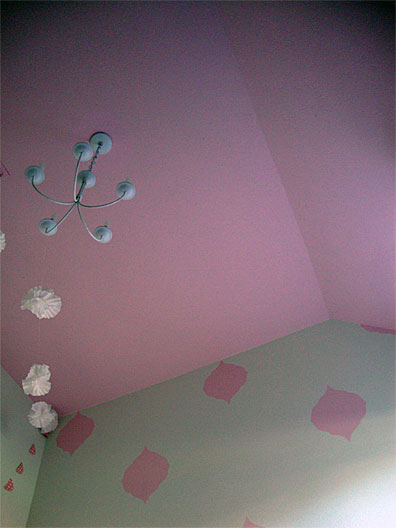
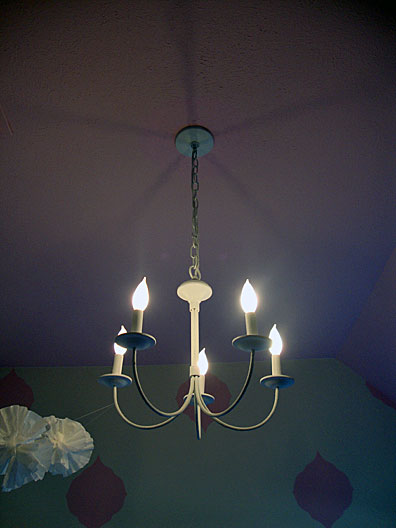
My favorite part of the room is when I look up at the ceiling.  I know this picture may look quite strange, but it's my view when I lay on the floor and look up.  I love seeing all that pink... and of course I love that white chandelier.... can you believe I picked up this chandelier at a thrift store (in Ocean Isle, NC - one of my favorite vacation spots!) for only $5!!!  It was originally the color red, but after a quick coat of spray paint and frosted light bulbs, it looks new again!
Girls Bedroom

It really makes the room sparkle when the lights are on....

Girls Bedroom

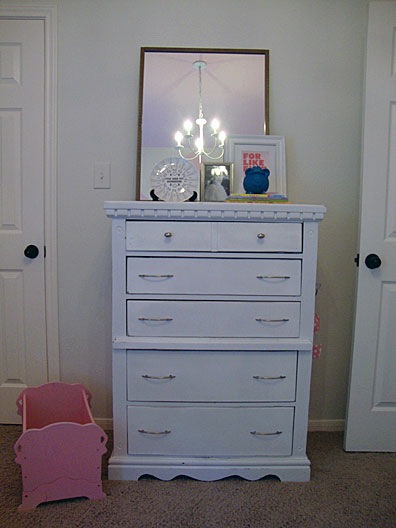
And I love that I can see the chandelier again through the mirror resting on the dresser....

Girls Bedroom

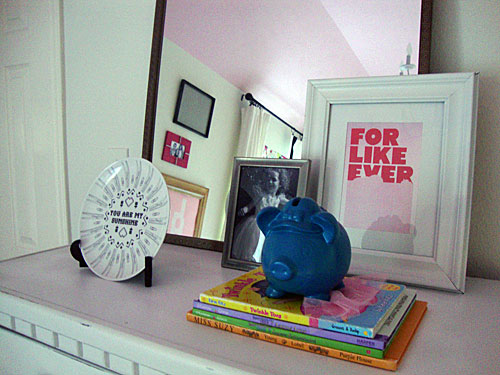
This mirror on the dresser has moved around with us year after year and has remained wrapped and packaged inside the moving box.  It was an unframed mirror with paint stains around the edges, but I wanted a mirror in this room so I decided to unpack the mirror and make it pretty.  I bought Greek key trim, cut it to fit the mirror, spray painted the trim bronze, then glued it to the edges... much better!

Girls Bedroom


Girls Bedroom

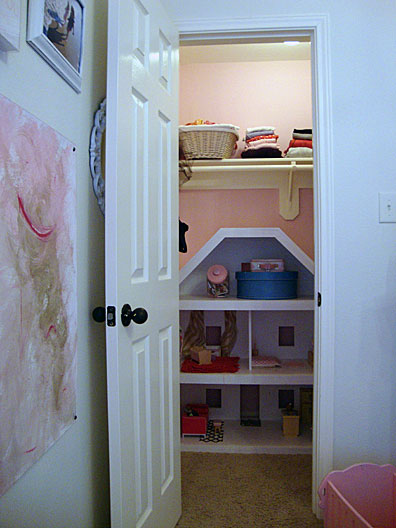
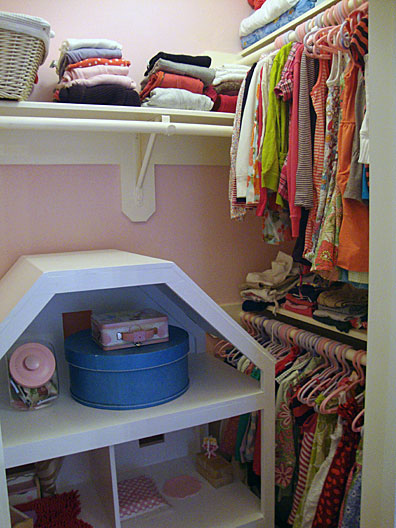
My dad made that beautiful dollhouse for the girls (we're beginning to decorate all those rooms!).  If you're curious, the girl's clothes are hung over on the side...

Girls Bedroom

And now for the best part.... my favorite, the before and after!  Here's the girl's bedroom before....

Bedroom Before

And after....

Girls Bedroom

Now that's a lot of pink.... I'm sure the girls are dreaming in pink!

Linking up to Savvy Southern Style, House of Hepworths, Southern Lovely, It's A Hodge Podge Life, Chic On A Shoestring Decorating, Remodelaholic, Fingerprints on the Fridge, Designer Garden, Tatertots and Jello, I Heart Naptime, Between Naps on the Porch, Wiccan Make Some Too, Skip To My Lou, Sumo's Sweet Stuff, Tip Junkie Coastal Charm and Bear Rabbit Bear.

Jun 7, 2011

Ottava Over the Kitchen Sink

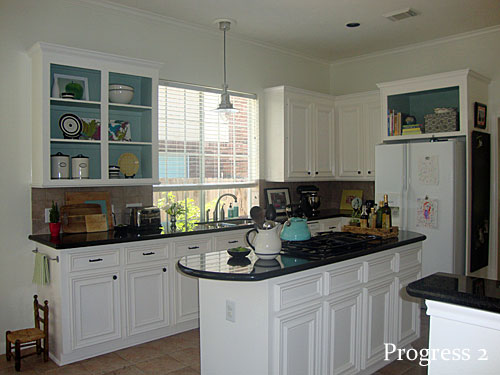
This post is loooooong overdue...... remember the list of projects I was hoping to work on when my parents were visiting?  Yeah, two months ago?  Well, my dad did help me hang the light fixture above the kitchen sink, just like he helped me replace the ceiling light in my son's bedroom.  And now I can see my kitchen sink with clarity.... and all those dirty dishes.  Nice!!

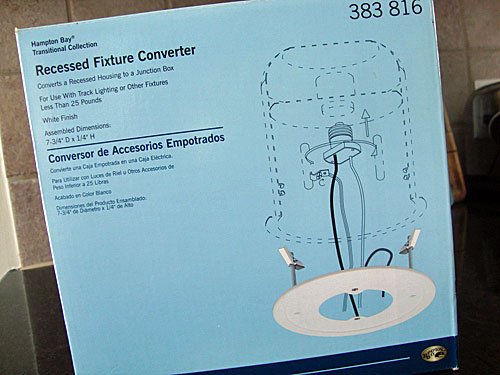
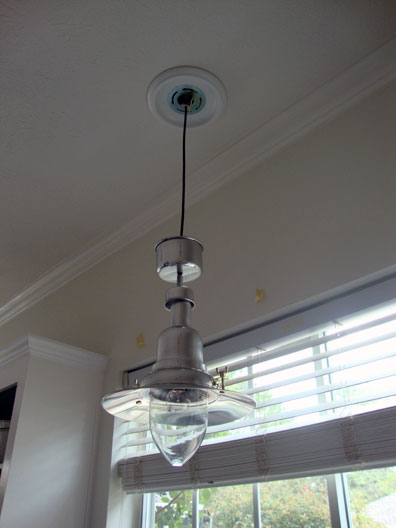
Our kitchen has a ton of recessed lights and I wanted to replace the one over the sink with a pendant light, specifically the Ottava light from Ikea.  I bought a recessed fixture converter (made by Hampton Bay available at Home Depot) and it made the process really, really simple.

Lighting

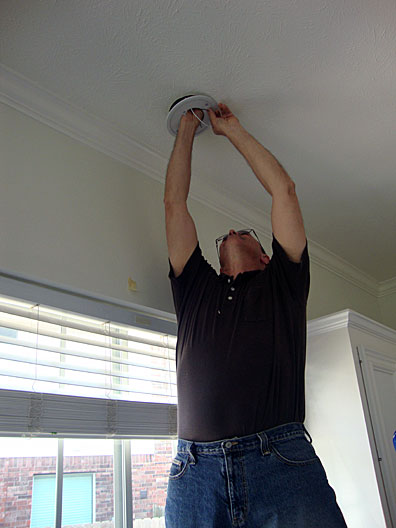
Well, simple according to my dad.  I was more like the proud assistant.... he said screwdriver, I handed him a screwdriver.  He said light, I handed him the fixture.  And so on.  Here he is installing the converter.... I think while he was standing up on the counter, he said something about not posting his picture to the blog.  Hmmm, request denied.  Sorry dad, your handiwork is too good not to be published :).

Lighting

I also bought a medallion to cover the larger-sized whole in the ceiling, then I painted it the color of the ceiling to blend it in a little better.  Almost done....

Lighting

Done...

Lighting

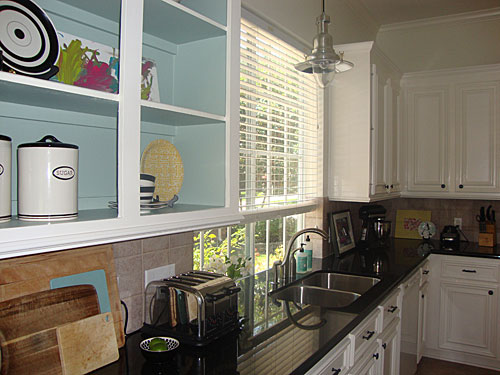
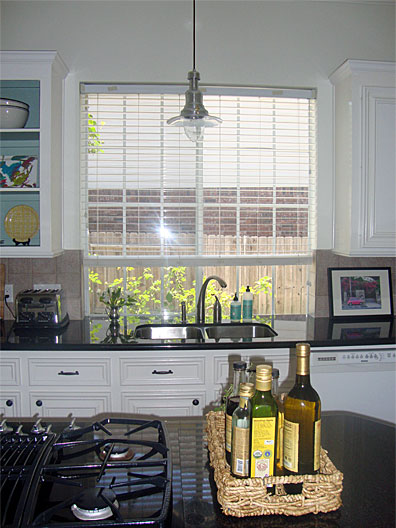
And here's a few more angles of the light in the kitchen...

Lighting

Lighting

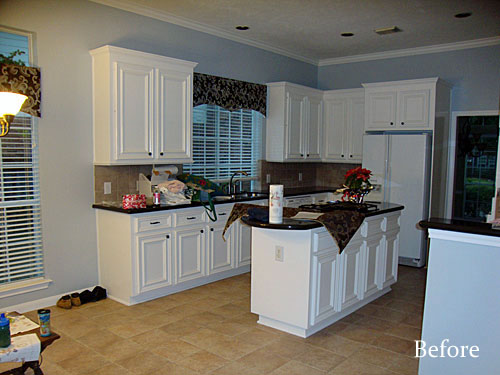
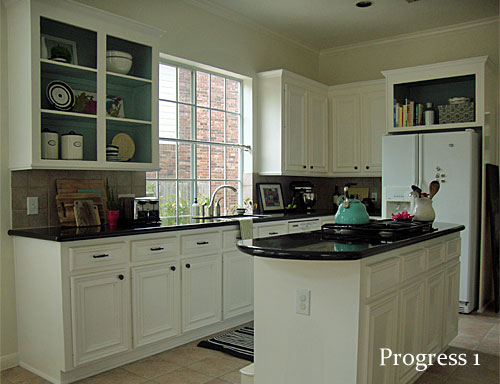
And since I love before and after pictures so much, I'll take you back to where we started.... here's what the kitchen looked liked shortly after we purchased the house...

Kitchen Before

Then after a little paint and decorating....

Kitchen Progress

And now with the new pendant light....

Lighting

Next project for this room..... window treatments!!!

PS - Thanks dad!

Linking up to Remodelaholic and Chic on a Shoestring Decorating.

May 27, 2011

Boys Room Big Reveal

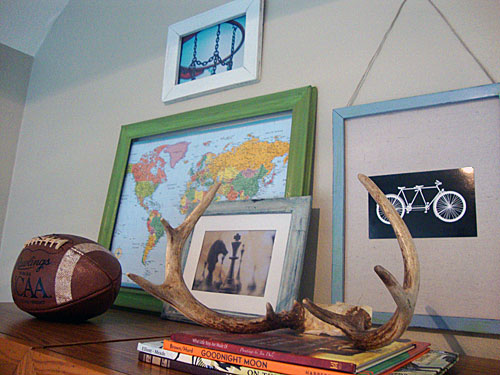
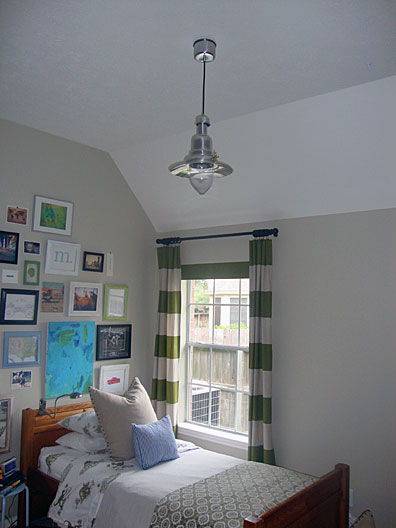
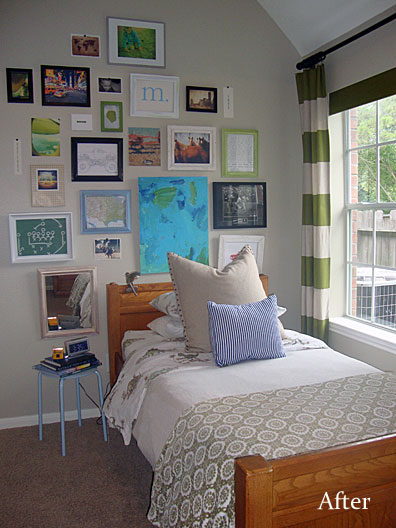
It's done, it's done, it's done!!!  I have finished decorating the first room in our house.... my 4-year old's bedroom.  I incorporated a lot of what we had from from our previous house in VA, purchased a few things and made just about everything else in the room.  He loves it (and so do I)...

Bedroom After

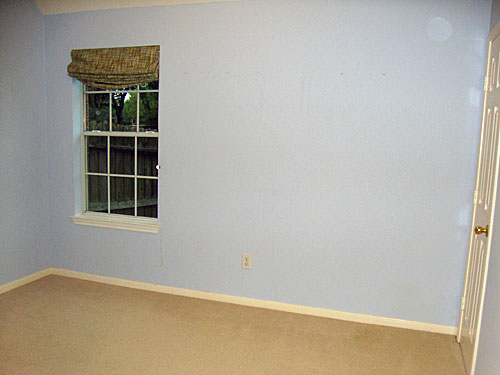
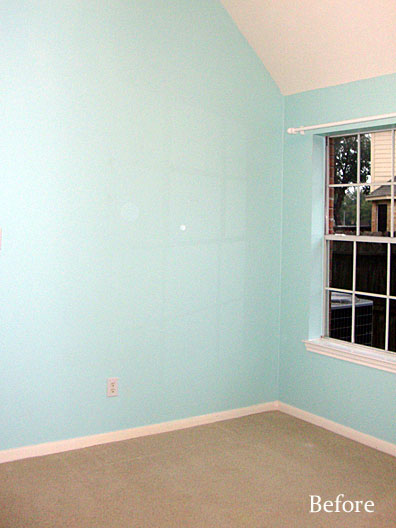
When we purchased the house, the room was originally painted in a turquoise-y color, my son was NOT a fan....

Before

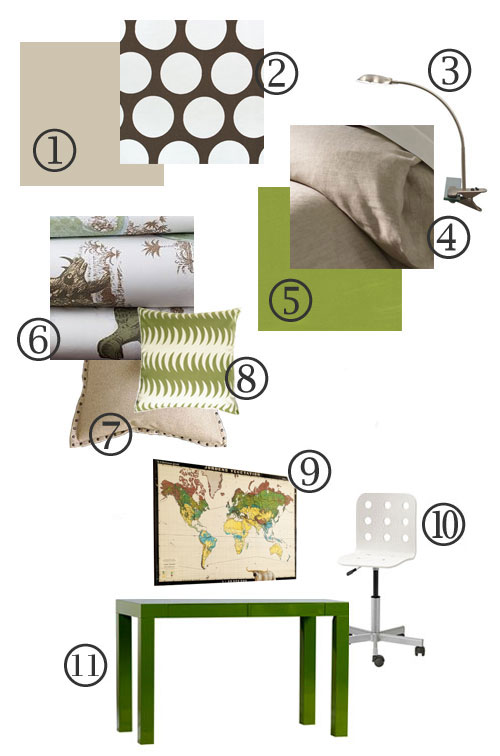
To start the decorating, I searched for inspiration and fabric, then I created a mood board.  For the most part, I followed the mood board, but sometimes when I'm decorating, spontaneous finds or creative thoughts change the room for the better.  My goal was to personalize my son's room to reflect his interests, make it comfy, and most importantly keep from spending a fortune.  This was the mood board...

Boys Room Board

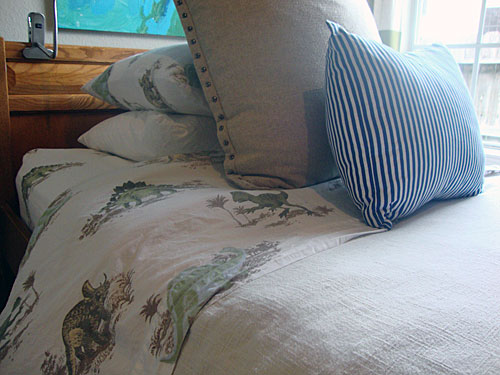
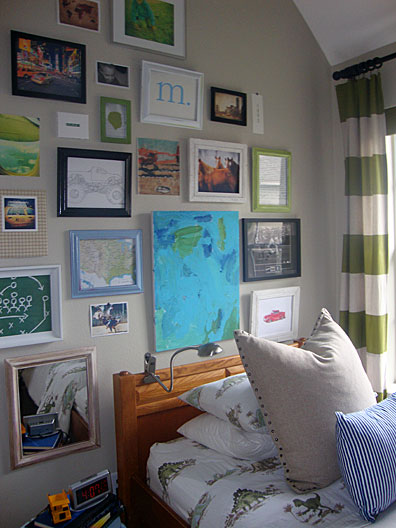
As soon as I came across those dinosaur sheets, the rest of the room design fell into place.... I couldn't wait to style the room.  The room was painted Grant Beige, I ordered the dinosaur sheets, made a duvet cover out of linen fabric (purchased at an amazing price), and made the striped pillow from sheets found at Target.  The nailhead-trimmed pillow and the geometric-patterned throw were being stored in my hall closet and I thought this was the perfect room to make them part of the bedding...

final8

final10

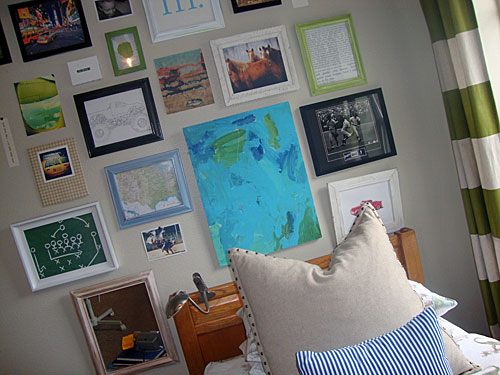
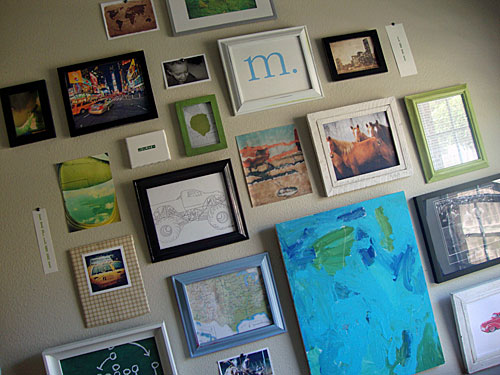
Above the bed, I created a gallery wall and I couldn't be happier.... I love the eclectic look (more on arranging the photos here and more gallery pictures here).

Wall Gallery

Bedroom After

final9

Wall Gallery

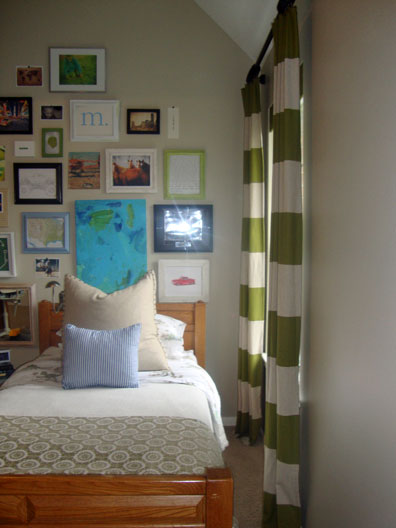
The curtain fabric is called Lexington Olive, from Tonic Living.  I was so excited when it arrived, I sewed two floor-to-ceiling curtain panels to help give some color to the window side of the room.  To darken the room for sleepy-time, there's a hidden roller shade behind the fabric covered board, created here.  I love the horizontal stripes on the curtains...

Curtains

Curtains

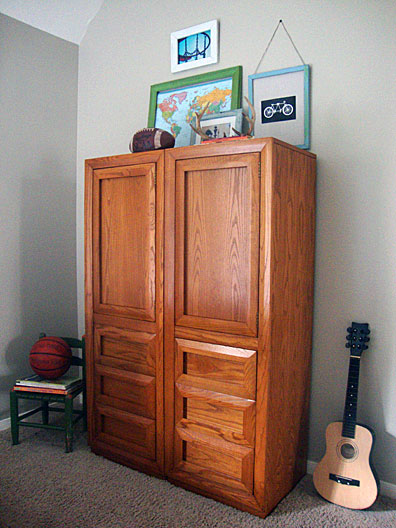
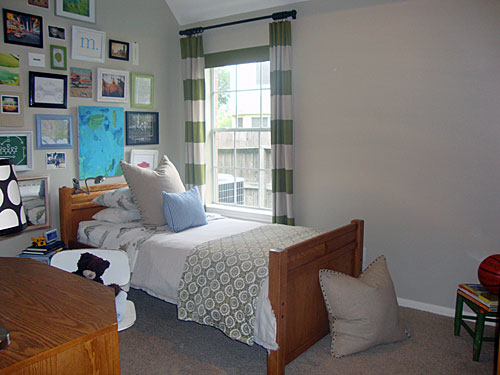
For the furniture, I decided to use pieces that were handed down to me from my brother.... it was his furniture growing up, so I kept it 'as is' (just in case he wants it back one day).

boy1

final5

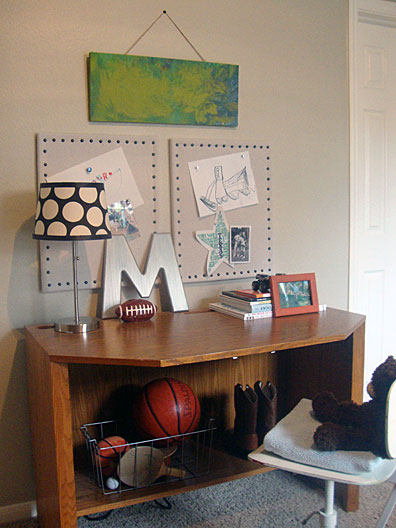
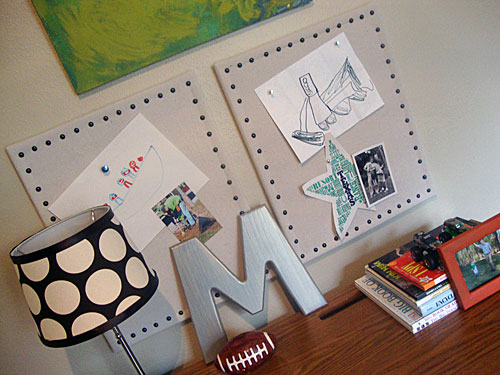
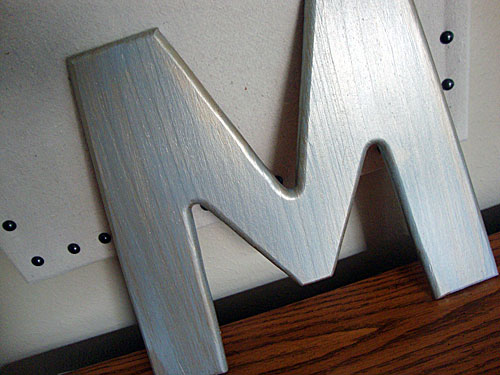
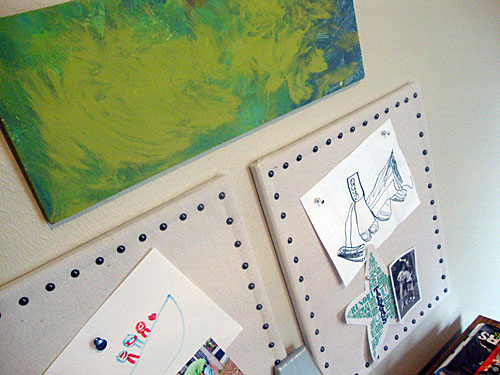
I debated for a while about refinishing the desk to keep the furniture from looking too matchy-matchy (as seen on the mood board), but in the end I kept it the same.  To add some interest to the desk area, I changed up a few things we had around the house.... I covered bulletin boards with drop cloths and nailheads, recovered the lamp shade in a large scale polka dot, and added a metallic-look to the letter M.

Bedroom After

final4

M

For the lighting, I swapped out a boob light for a hanging light.... the Ottava from Ikea.  This was my first electrical job and I'm no experienced pro, but I am looking forward to my next light hanging project!  I love this look.... I think it's kinda unexpected...

final2

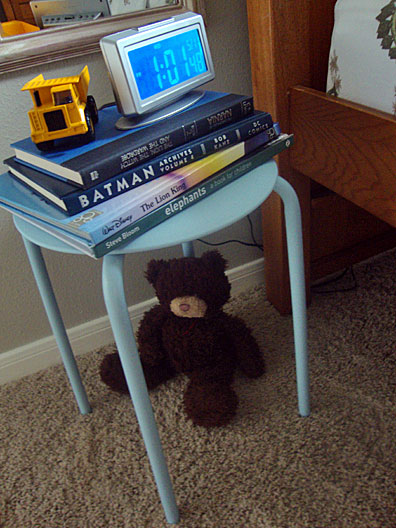
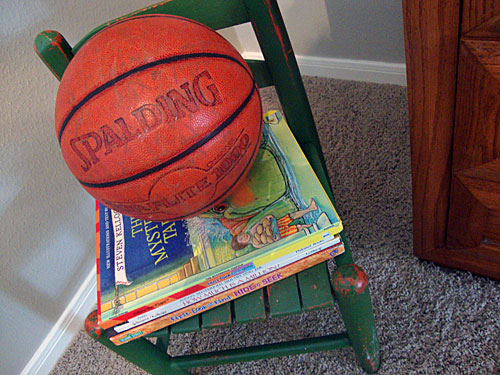
And here's a few more extras in the room....

boy6

final3

Bedroom After

And most importantly, the before and after shot...

Before

Bedroom After

And one last wide view....

final7

For those interested, here's the sourcing info:
Wall Paint:  Benjamin Moore Grant Beige
Sheets:  Pottery Barn Kids Dinosaur Sheeting
Linen Duvet Cover:  Fabric from Joann Fabrics
Geometric Throw:  Home Goods
Striped Pillow:  Fabric, Circo sheets from Target
Studded Pillow:  West Elm
Curtains:  Fabric, Lexington Olive from Tonic Living
Blue Nightstand/Stool:  Marius from Ikea
Hanging Light Fixture:  Ottava from Ikea
Lamp:  Clip Led Lamp from Target
Lamp Shade:  Fabric, Dandie Cotton Chocolate/Linen from Buy Fabrics
Bulletin Boards:  The Board Dudes from Target
Bulletin Board Fabric:  Canvas Drop Cloths from Home Depot
Bulletin Board Nailheads:  Black High Dome Upholstery Nails from DIY Upholstery Supply
Horse Print:  Pioneer Woman
Everything else:  hand-me-downs, garage sales, 2nd hand stores, and handmade...

Hope you have a great weekend!!!

Linking up to Remodelaholic, It's A Hodge Podge Life, Simple Home Life, House of Hepworths, Fingerprints on the Fridge, Between Naps on the Porch, Thrifty Decor Chick, Somewhat Simple, Chic On A Shoestring Decorating, I Heart Naptime, The Shabby Chic Cottage, Funky Junk Interiors, Sumo's Sweet Stuff and Brooklyn Limestone.
Related Posts Plugin for WordPress, Blogger...