Sep 25, 2011

A Lived In Home

Today I'm over at Megan's blog, A Lived in Home


It's Makeover Monday and I'm sharing all the details of my girl's bedroom.... stop over and say hi :)

Sep 23, 2011

Welcome Fall

Today marks the first official day of Fall!!!  It's my favorite time of year..... leaves changing, windows open, cool breeze, sweaters, apple pie, hot chocolate, bonfires..... the list goes on!  Since it's Fall, I decided to update the look of my back door and make it a little cozy and add a wreath.

I've been storing up ideas Pinterest and thought it's about time to complete one of the projects saved to my DIY board.....  these are two of my favorite handmade wreaths.....


I recreated the one sold by The Simple Standard.  Simple Standard's is made from burlap, but I used several extra painter's drop cloths that I had on hand, so my new wreath is slightly different.....

Wreath

I cut tons of 1"x3" (approximately) strips of drop cloth, then washed and dried them to fringe the edges (if you wash the tiny strips in your machine you may want to put them in a mesh bag).  Once the strips were dried, I used my glue gun and put a dot of glue on the back/middle of each piece, then attached it to a styrofoam wreath.  I glued the strips very, very close together.

Wreath

Then I added black and white fabric and an old, turquoise, knitted baby hat to one edge for some color...

Wreath

And here's my wreath...

Wreath

And since you can see my reflection and the reflection of my newest little addition to the family through the window, I thought I'd give you a better picture..... my new baby.... Riggs (he's definitely keeping me busy this Fall)!

Dog 

I'm lovin' all that comes along with this time of year and I hope you're enjoying the beginning of Fall!  Happy Fall.... and happy Friday!!!

Sep 20, 2011

One Question: Brown in a Girl's Bedroom

'One Question' is a series to answer reader's decorating questions with a hope to inspire others who have a similar dilemma.

* * * * * * * *

Kristy,

I'm updating my daughter's room now that she's moved into what used to be the guest room.  The windows have brown roman shades that I bought a while ago.... the shades are perfect for the windows and I don't want to have to spend more money on new curtains when I have something that works just fine.  Could you help me with some ideas on how to incorporate a chocolate brown color into a girl's bedroom.  Thanks so much for your help!

Grace

* * * * * * * *

Here's a few inspiration photos of girly bedrooms that incorporate the color brown....

Girls Bedroom

Girls Bedroom

Girls Bedroom

Girls Bedroom

Girls Bedroom

Girls Bedroom

Girls Bedroom

All these rooms are stunning!!!  And they all incorporate the color brown!  Whether it's brown in a bed frame, a rocker, wooden frames, the nightstand, flooring, an embroidered pillow.... the rooms are full of character and depth.  I love these bedrooms.

I, especially, am head over heels for the third photo down (so you don't have to scroll back up, here it is again).  I think the brown roman shades that Grace has in her girl's room would work well with something similar to this design.  The coral color looks so great combined with the brown.... it moves away from the recent trend of pink and brown and seems more sophisticated, so stylish!

Girls Bedroom

So, to Grace I say.... keep the brown shades!!!  Paint the walls a light color to keep the bedroom bright and airy, like a creamy white.  Create a gallery of different styled frames, then choose one bold color to offset the brown and paint the dresser and/or nightstand (I really like that coral color), choose printed pillows that will highlight the same bold color, then add some playfulness to the room by making (or buying) colorful pom-poms or a pennant banner.  Have fun designing Grace!

Do you have a decorating dilemma?  Read this to find out how to submit your question and be considered to participate in the One Question series.

** Apologies, I do not have the sources for most of these photos. **

Sep 16, 2011

Welcome Stripes

I've been craving stripes in my house, remember here?  Well, as of this week I have stripes!!!  They're in the entry way....

Entry Way

And no I do not have the patience to paint those stripes, nor the budget for wallpaper.... that is tape!  It's Japanese Washi Tape from Cute Tape and I love it.  It's easy to put on and easy to take off.... there's absolutely no mess (I'm not paid for this..... there's really NO mess).  I could remove it tomorrow and my wall would be just as it was before I added the tape.  Here was my process....

I measured how far apart I wanted the stripes and made a tiny mark on the wall, then pointed my laser level at the wall, stretched out the tape and pressed it against the wall....

Entry Way

Once all the stripes (tape) were on the wall, I used an exacto knife to trim the edges on the top and bottom for a clean cut....

Entry Way

Entry Way

In the end, I have a wall of stripes that cost me less than $30 (and definitely doesn't look like tape)!!!

Entry Way

Entry Way

I placed a few books, a lamp recovered with fabric (Gazebo Cloud from Tonic Living) and a few frames, including the key art I gave to the husband for Valentine's Day, all on the blue desk (that was originally in this room, then moved to this room).

Entry Way

And now for the best part..... the before and after.  Here's a picture of the entry way when we purchased the house.....

Entry Way Before

And now.....

Entry Way

Such an easy (and inexpensive) way to update a wall!  So, how have you used Washi Tape?  Any projects planned?

Linking up to I Heart Naptime and Between Naps on the Porch.

Sep 13, 2011

A Stencil & A Painting

I've been decorating the dining room and thought I'd show a little of what I've been doing..... painting and stenciling.  I finished a pink abstract painting the other day, then decided the walls needed a little glamour, so on a whim I started to stencil... with a piece of cardboard and a marker!!!

Painting & Stencil

I had saved a Moroccan-styled template that I saw a while ago from Jones Design Company.  Emily created the template, a tutorial for stenciling the wall and then so graciously made the template available online here (for free!).  I printed the template, cut out the design, then traced the design and cut it out on cardboard (I made the top and bottom ends come to a point).  To "wallpaper" the wall, I pressed the cardboard design against the wall, traced it with a gold colored pencil, then used a Prismacolor metallic gold fine point marker to go over my pencil marks....

Stencil

Stencil

And this is the result...... or at least the beginning.  The gold marker gives a subtle touch of glamour..... it's not overwhelming and adds the perfect amount of beauty to the walls!!!. 

Stencil

I'm working my way around the room and am excited to see all four walls finished with an extra touch of shine!

Sep 6, 2011

Made By Girl

The amazing and talented Jen Ramos behind Made By Girl and Cocoa & Hearts featured my girl's pink bedroom on her blog today.... I love surprises!


I had purchased Made By Girl's LOVE candy print in pink and added it to the gallery wall in the girls room.... I think it's such a fun print and perfect for little girls, especially the pink color!


Jen's designs are stylish, her paintings are glamorous and her blog material is full of inspiration.... I love it all!  Thanks Jen for sharing my girl's room!!!

Playroom Big Reveal

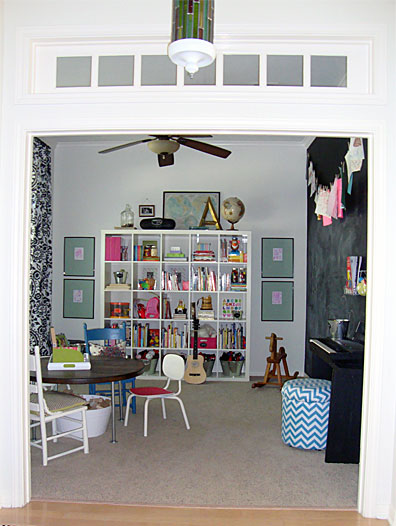
Woohoo!!!  The playroom is decorated and was finished just in time for the start of school.... perfect timing!  I'm excited to be doing some of our school work in such a fun room (and I love that I feel a little more organized since books, toys, games, etc now have their own designated spot in the house).
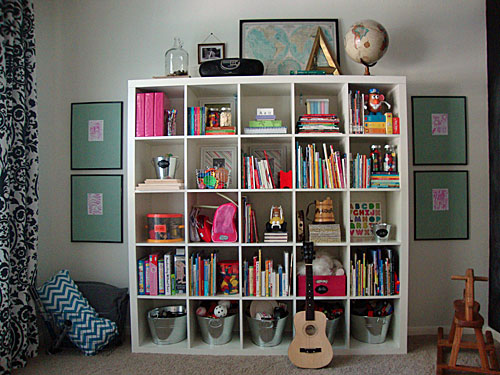
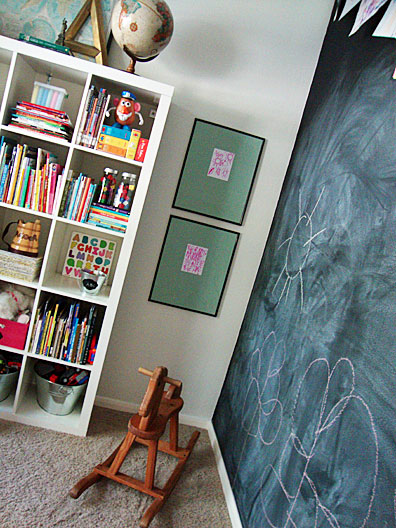
Playroom

The Ikea Expedit, that I purchased 
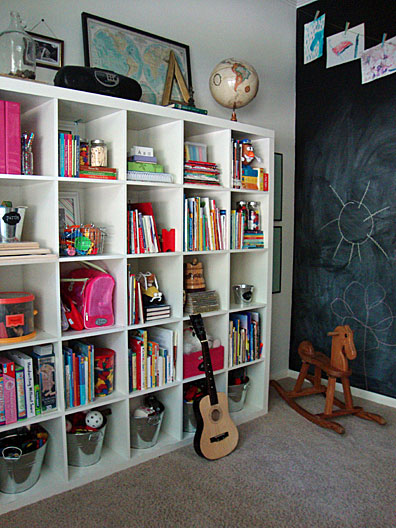
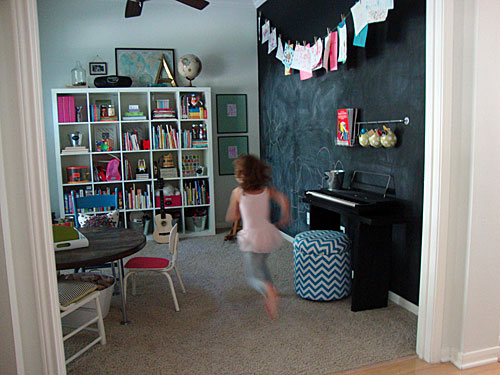
here, is a tremendous help in keeping the playroom organized.  The divided shelving makes it really easy to put toys away and keep them organized in separate areas. The galvanized bins on the bottom are a huge plus..... perfect for storing Lego's, play food, toy cars, etc.

Playroom

Playroom

Playroom

Playroom

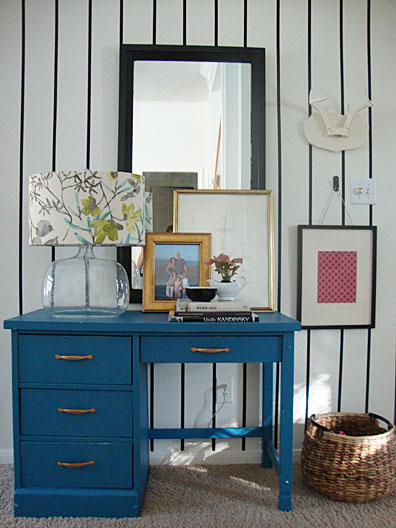
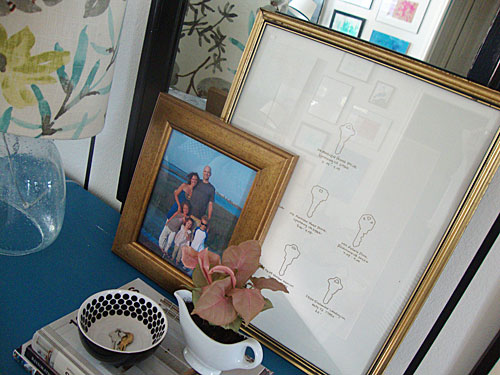
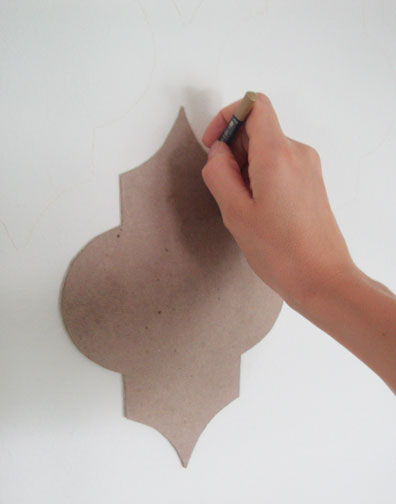
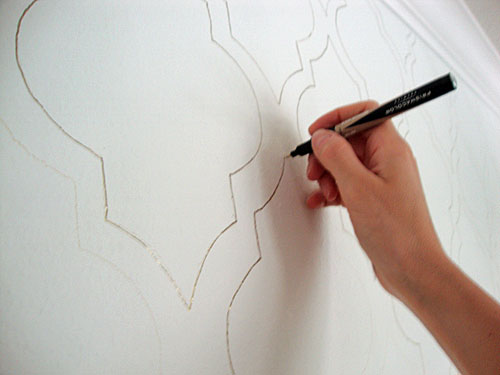
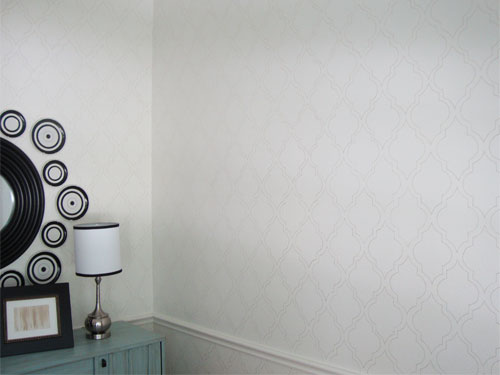
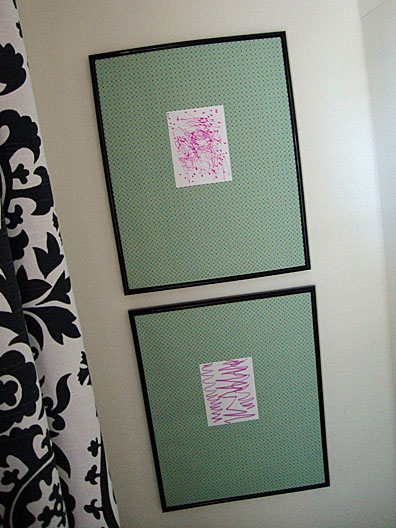
To add more color on the shelving wall (besides all the toy colors), I flanked the bookcase with two frames, colored decorative paper and my daughter's scribbles here....

Playroom

Playroom

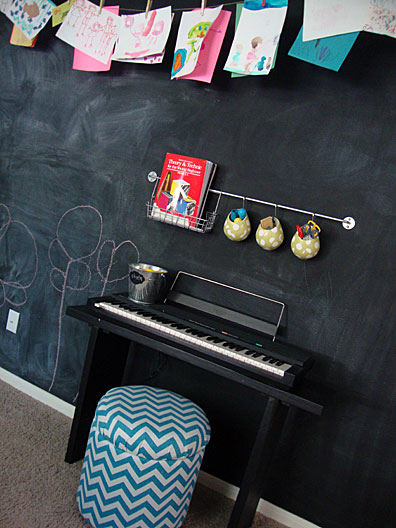
To keep their scribbles, doodles and artwork highlighted, I painted an entire wall in black chalkboard paint here.  I was a little nervous to have one whole wall black, but I LOVE it!  The kids are constantly chalking and are thrilled they can draw huge, life-size pictures on the wall.....

Playroom

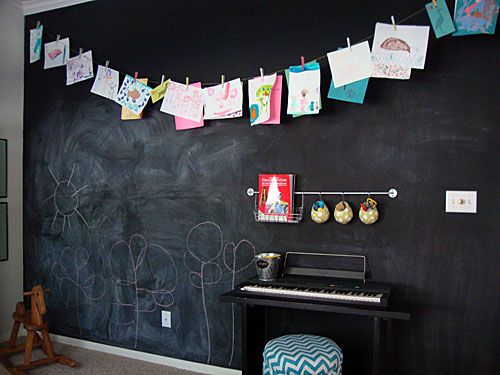
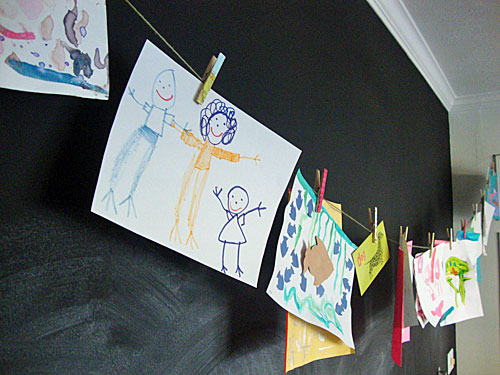
To display all their art creations that are done on smallish-sized paper, I strung yarn across the room here and clipped their work using dressed-up clothes-pins here.

Playroom

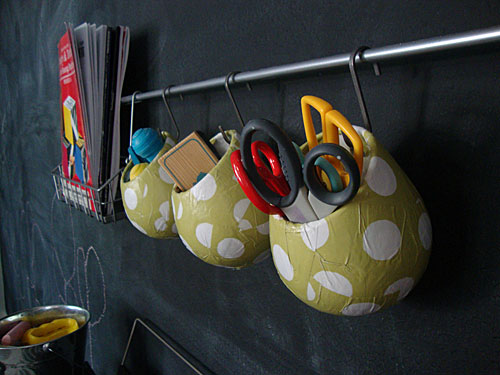
I thought one huge black wall needed something else (and I needed a place to put a keyboard), so I painted a table that used to be in our hallway in VA with the same black chalkboard paint as the wall and placed the table on one end of the wall.  I added the keyboard, a Bygel rail and three Asker containers from Ikea (I modge-podged small pieces of decorative paper on the containers), and recovered a round ottoman in a chevron print (I used the backside of the chevron - Flatiron Pacifica available thru Tonic Living - so the color was a little muted).

Playroom

Playroom

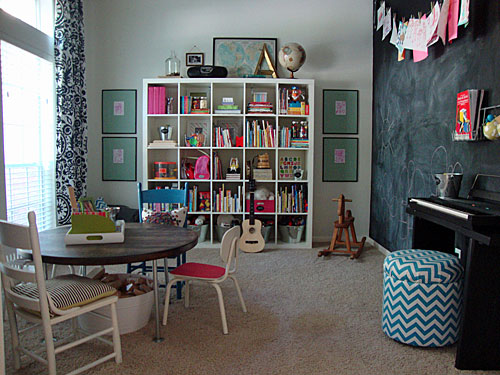
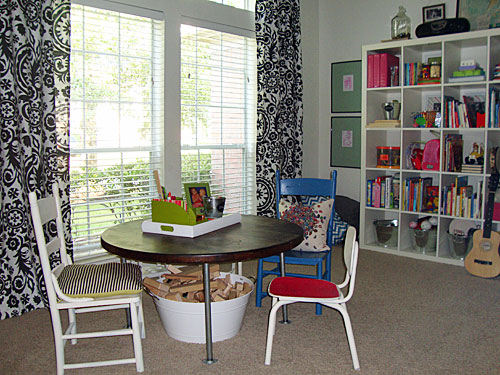
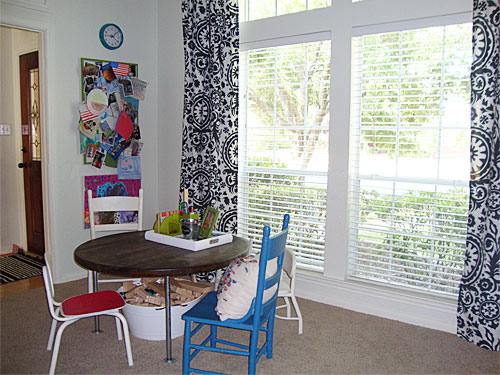
Across from the chalkboard wall is a huge window that lets in plenty of natural light.  I wanted bold curtains that would help balance the dark wall on the opposite side.  I ordered several fabric samples here and ended up choosing Varenna Charcoal, available thru Tonic Living.  I made the curtains floor to ceiling length....

Playroom

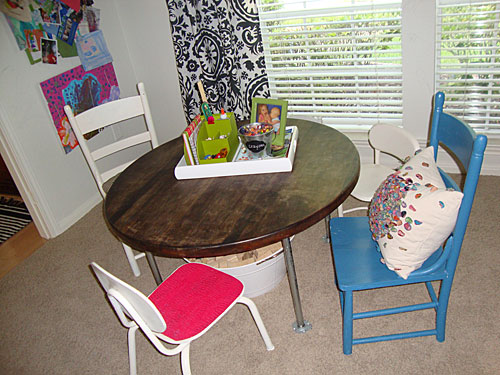
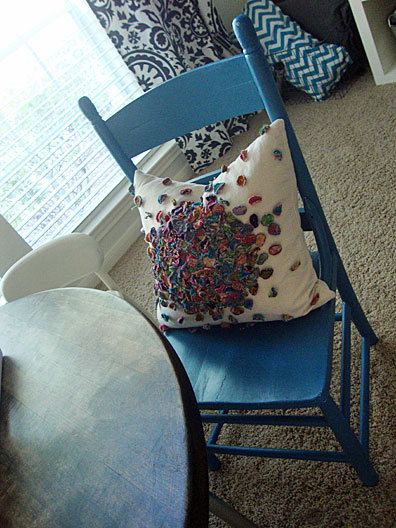
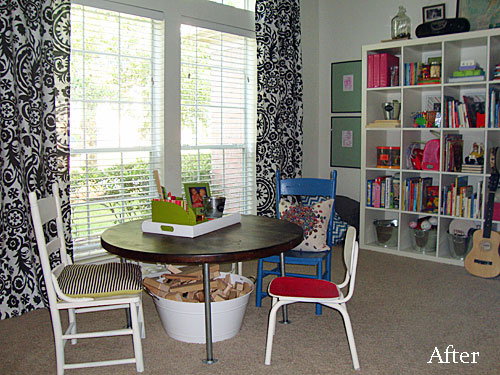
Next to the window is another table for the kids.... their own activity table!  I used a round wooden table top and plumbing materials to make the height of the table at my kid's seated comfort level (more about that here).  I painted a few kid chairs Heirloom White by Rustoleum and sawed off a few inches from the legs of two larger (adult-sized) chairs here to make them comfortable for the kids.  I painted one chair a peacock blue color and added a few pillows for more color....

Playroom

Playroom

On the top of the table is a tray to encourage the kids to create more artwork.... I love rotating their pictures on the clothes-pins and in frames throughout the house....

Playroom

Behind the activity table is a bulletin board to hang more artwork....

Playroom

The kids love having their own space for creativity and play.... I love that it's organized (and neat at the moment)...

Playroom

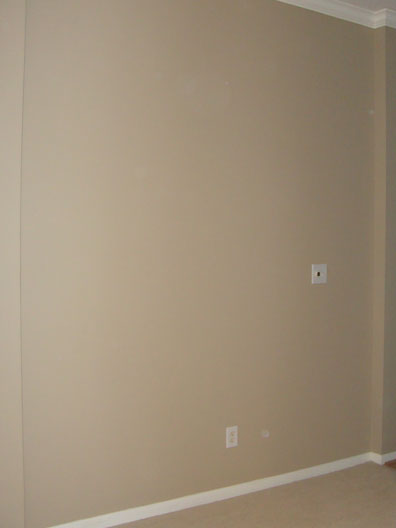
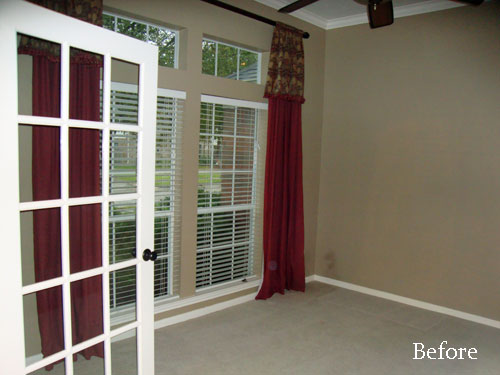
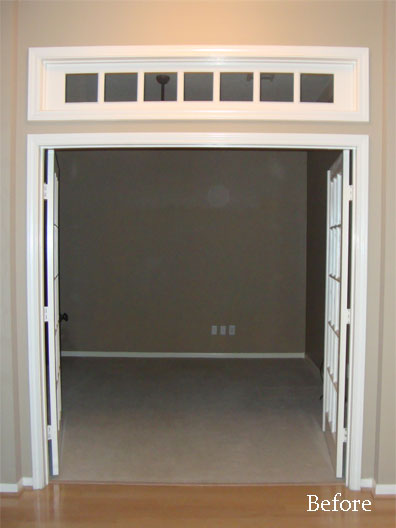
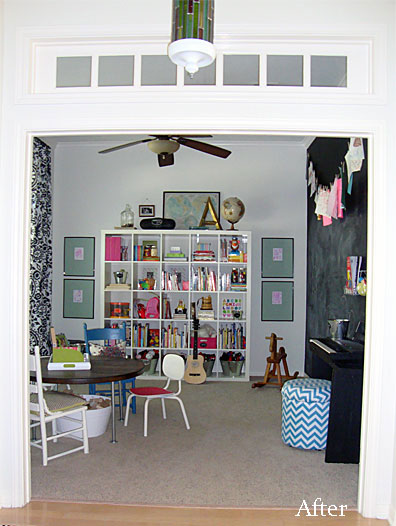
And now for my favorite part..... the before and after.  This is what the room (office) looked like when we purchased the house.  I removed the french doors here to open up the space, I also removed the curtains and painted three of the walls Floral White and one wall in black chalkboard paint from Benjamin Moore.

Playroom

Playroom

Playroom

Playroom

Related Posts Plugin for WordPress, Blogger...