
You can do this too...
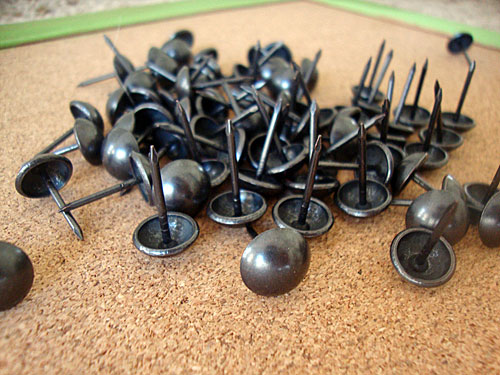
Gather a framed bulletin board, fabric (I used painter's drop cloths), a staple gun, and a whole lot of these (nailheads):
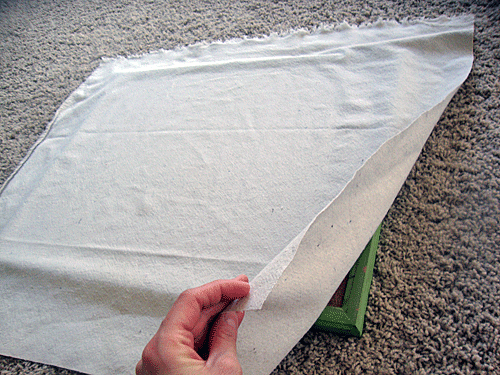
Measure the frame and add two inches to each side, then cut the fabric to fit the measurement. It should look something like this once the bulletin board is placed on top of the cut fabric...

Place the fabric on top of the bulletin board...
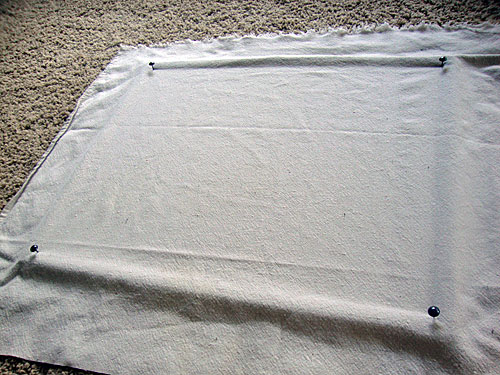
Smooth out the fabric and push a nailhead into each corner of the board to hold the fabric in place (I pushed the nail in the cork - not the wooden frame).
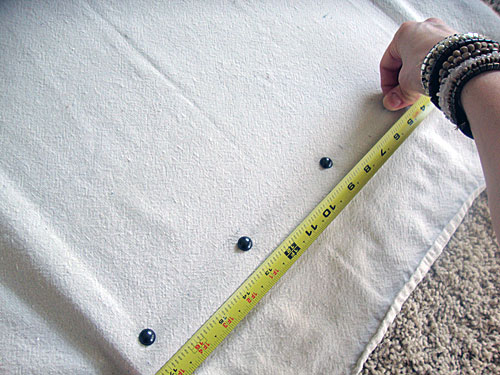
Add nailheads along one side, equal space apart. Placing a measuring tape along the edge helped me figure out even spacing - every 1 1/2 inch.
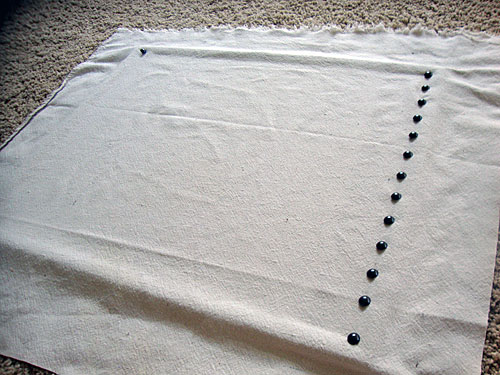
Once the nailheads are lined up on one side, push nailheads in the opposite side of the board. Then push the nailheads along the top, then the bottom. Be sure to pull the fabric tight as you move along.
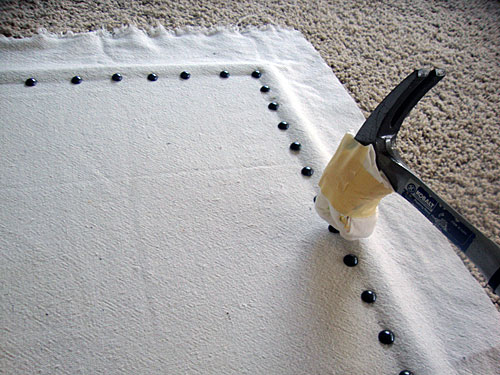
Double-check to make sure all the nailheads are pushed in the board... if some look out of line, pull them out and secure them again (remember, it's a bulletin board, there will be holes). If some nailheads were a bit stubborn and didn't go in all the way, then hammer them in. A rubber mallet is good to use so it won't take the finish off a nailhead. I don't have one, so here's my version... a metal hammer wrapped with paper towel and taped together...
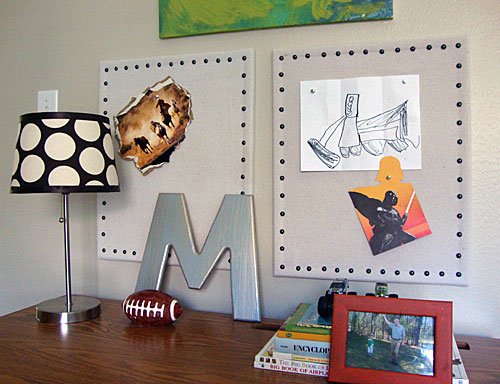
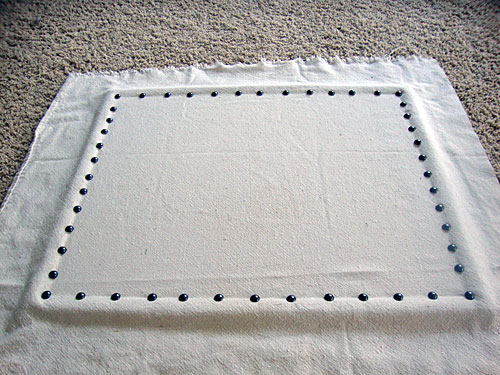
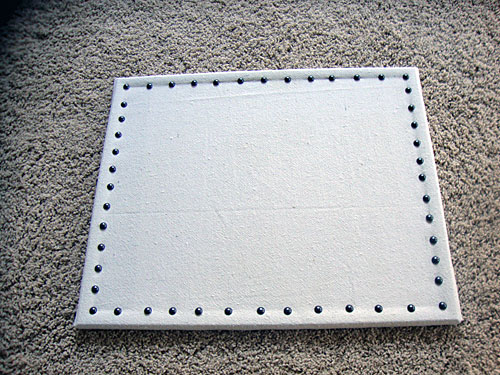
The front of the bulletin board should eventually look similar to this...
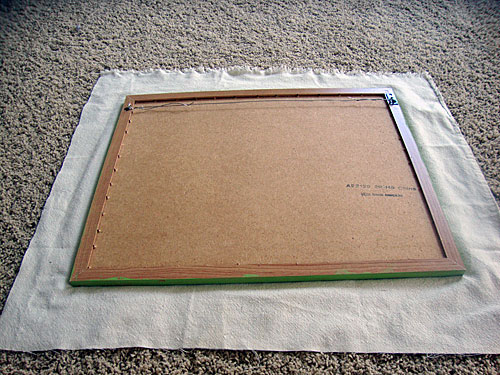
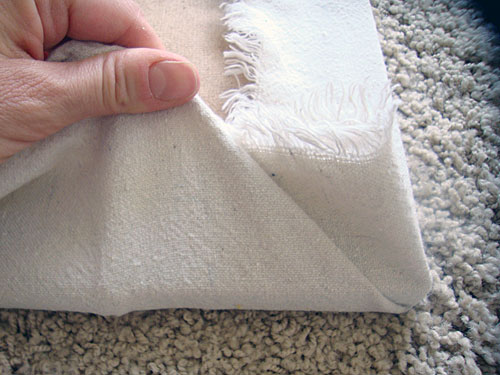
Then turn the bulletin board over and lay the fabric ends flat.
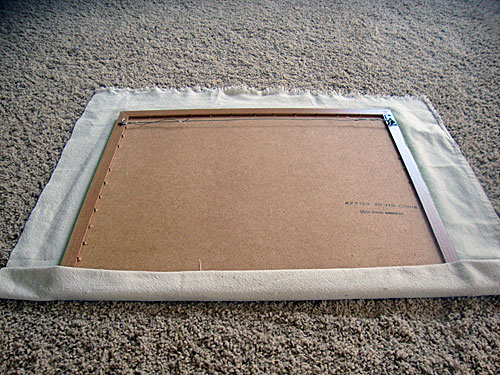
Then folder over one edge onto the wooden frame, pulling it tight...
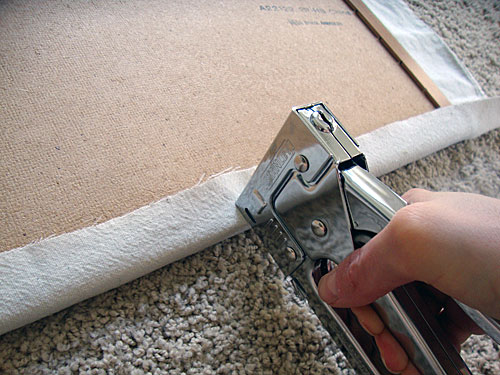
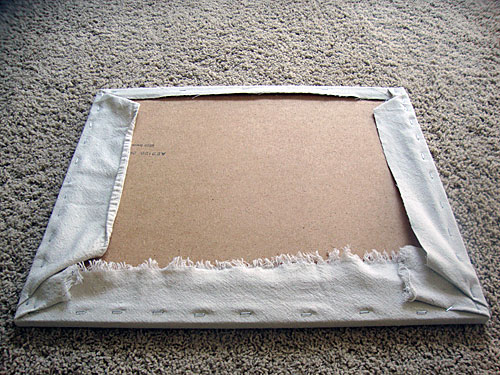
Use a staple gun to secure the fabric to the back of the frame...
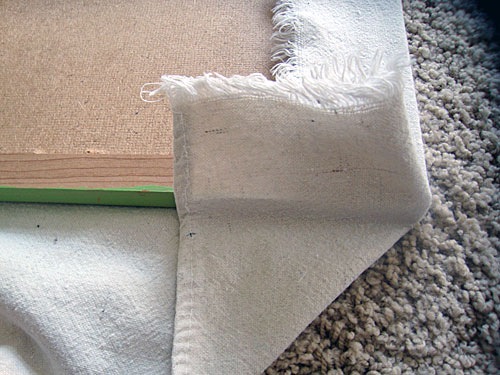
Then wrap the corners (just like folding a present)...
Staple all around the edges...
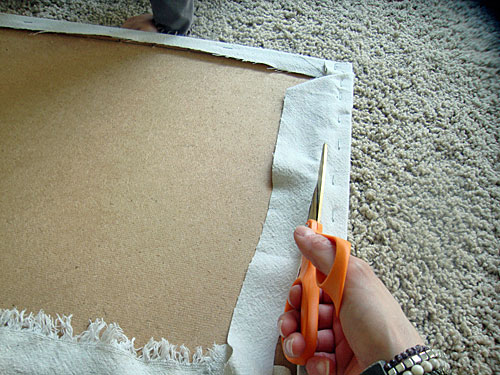
If your fabric has a lot of over-hang (like mine), take the scissors and cut off the excess....
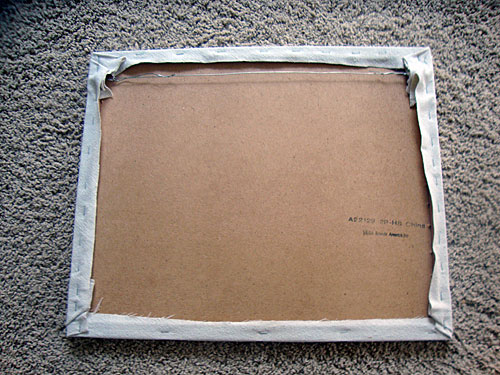
The back of the bulletin board should now look similar to this...
And, when it's turned over, look similar to this...
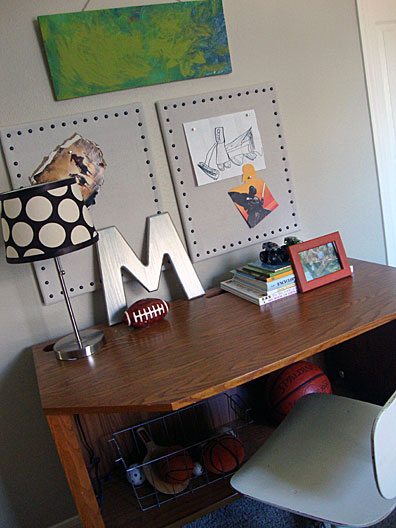
Time to hang it up....
This project could also be done with a bold colored fabric or a fun print to jazz it up a little. How have you dressed up your bulletin boards?
Linking up to The Lettered Cottage, The Shabby Chic Cottage, 3 Meadow Lake Cottage, Keeping It Simple, Polly Want a Crafter, Skip To My Lou, Sisters of the Wild West, Laugh, Love and Craft, Funky Junk Interiors, Happy To Design, Chic on a Shoestring Decorating, Tatertots and Jello, Ginger Snap Crafts, Today's Creative Blog, Hope Studios, Around My Family Table, The DIY Showoff, Craft-O-Maniac, The Not So Simple Housewife and Six Sister's Stuff.
What a great project...I'm definitely putting this one in the inspiration files! Thanks showing how it's done! Love your "rubber mallet" too :)
ReplyDeleteI'd love it if you'd link this up to The After Party @ 3 Meadow Lake Cottage...
http://www.3meadowlakecottage.com/2011/05/after-party-and-amazing-kitchen-redo.html
~Erin
Thanks for the invite... I'm all linked up! Sometimes I think my rubber mallet is more creative than the actual project :).
ReplyDeleteNice take on a bulletin board, thanks for sharing
ReplyDeleteI've been looking for something to add to my son's bulletin boards in his room. I really like the look of this and it is by far the easiest idea I have come across. Thanks so much for sharing. Pinning!
ReplyDeleteDefinitely easy.... the best part is that it takes less than an hour to complete and in the end you have an amazing new board!!!
ReplyDeleteThis is a great way to freshen up a bulletin board! It looks perfect in your room! Please stop by www.laughloveandcraft.com and link up to my Share the Wealth Wednesday Link Party! I'm your newest follower!
ReplyDeleteThese look fabulous! Great project idea.
ReplyDeletewww.itsybitsypaper@yahoo.com
Thanks y'all!!!
ReplyDelete@LrSchwtz - Thanks for the invite.... I'll be there Wednesday!
Too cute! Thanks for the how to tips!
ReplyDeleteWow, those are way cool! I misread the title of the post and thought it was nailhead HEADboards, but that would be cool, too . . . I kind of want to expand your idea into a headboard but I wonder if that would be too ambitious for me ;-) I love your bulletin boards! Gorgeous work!
ReplyDeleteRachel @ Maybe Matilda
ooh, a headboard... now that would be amazing!!! Let me know if you tackle that project.... I'd love to see pictures!!!
ReplyDeletegreat tutorial. your bulletin board turned out awesome. I would love for you to link it up at our link party going on all week.
ReplyDeletehttp://www.sistersofthewildwest.blogspot.com/2011/05/dishmat-winner-weekend-features-sister.html
Amy
Thanks for the invite.... tutorial is all linked up :)))
ReplyDeleteHoH thinks you are fantastic!
ReplyDeleteI've featured you at this weeks link party.
Stop by and grab a button. You so deserve it!
xoxo
Allison @ House of Hepworths
Kristy, just came from Allison's to see you!! How great ...you can be sure I will make these!!
ReplyDeletexoxo
Karena
Art by Karena
Come and enter my New Giveaway from Serena & Lily! You will love it!
Oooh, Allison!!! Thanks for the feature!!!
ReplyDeleteThese are wonderful. TFS!! Stopping by from House of Hepworths.
ReplyDeleteI'm back again :-) I thought this was such a cool idea, so I featured it on my blog today! You can see it here: http://www.maybematilda.com/2011/05/five-favorites-521.html
ReplyDeleteThanks for sharing your great project!
Rachel @ Maybe Matilda
Rachel - thanks for the feature!!!
ReplyDeleteVery cute indeed.
ReplyDeleteHi Kristy...
ReplyDeleteWelcome to the Sunday Favorites repost party, my friend! I love how your bulletin boards turned out...and of course the nailhead trim just "makes" them! What an awesome idea! Great tutorial too! Thank you so much for sharing this wonderful post with us for the Sunday party today! I hope that you'll join us again!
Warmest wishes,
Chari @Happy To Design
@Chari - Thanks for the welcome!!!
ReplyDeleteThis is too cute! It is definitely being logged away in my 'crafts to do' folder! Great job!
ReplyDeleteThanks :)
ReplyDeletevery useful and cute
ReplyDeleteThanks for sharing this tutorial. I love the upholstered look of these boards.
ReplyDeleteI found you through the DIY Showoff link party and am your newest follower. Come check me out, too, if you're interested @ Carissa's Creativity Space
This looks so fabulous! What an easy, but significant transformation! Thanks so much for linking it up to my {re}create into something new blog party! Hope to see you next week for some more awe inspiring transformations!
ReplyDeleteKaitlin--The Not So Simple Housewife
http://notsosimplehousewife.blogspot.com
You really spruced it up quite nicely~ :)
ReplyDeleteSo simple and cute. Great post!
ReplyDeleteI've seen a look alike in Ballard Designs. Your looks great!! I'm pinning this for later!
ReplyDeleteTHANKS!!!
ReplyDeleteI love the nailhead idea! I would have never thought of that! They look so classy and I think that I need some in my office. :) Thank you so much for linking up to Strut Your Stuff Saturday! We are so grateful for your support and we hope that you will be back tomorrow to share more great ideas!
ReplyDeleteCamille @
SixSistersStuff.blogspot.com
I agree with you. This post is truly inspiring. I like your post and everything you share with us is current and very informative, I want to bookmark the page so I can return here from you that you have done a fantastic job. Liga Inggris
ReplyDeleteI am very happy to read this. This is the kind of manual that needs to be given and not the random misinformation t hat's at the other blogs. Appreciate your sharing this best posting.
ReplyDeletewww.indobd.com
Indobd
Indobd.com
www.indobd.com
Spot on with this write-up, I truly think this website needs much more consideration. I’ll probably be again to read much more, thanks for that info.
ReplyDeleteImpresscms.org
Tku.edu.tw
Marcolongo.org
Hello! I just would like to give a huge thumbs up for the great info you have here on this post. I will be coming back to your blog for more soon.
ReplyDeleteVisit Site
Webself.net